Strengthening the fit: from the waist to the heels
Strengthening the fit: from the waist to the heels
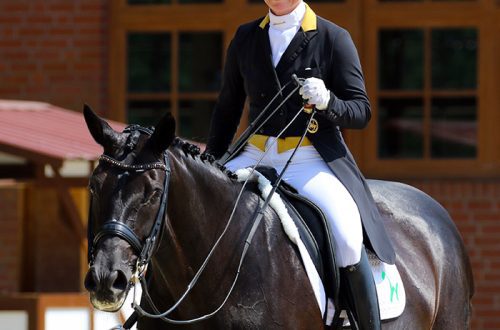
Let’s analyze how your body should be positioned in the saddle from waist to heels:
- Your legs lie calmly around the sides of the horse, weight evenly distributed on the right and left stirrup.
- Heels down. Probably the “Heel down” command is used by riding coaches more often than others. And rightly so: it all starts with the heel. If your heels are down, then your feet will remain stable and you will be able to ride in balance.
- Your shins are at the sides of the horse, slightly behind the girth. They should stay in a stable position, don’t rock back and forth.
- Your knees act as a support for the body and must remain in place at all times, in contact with the saddle. You don’t need to compress them.
- The sluice (inner thighs) provides contact with the horse and support of the body when riding in a two-point position or over obstacles.
- Your abs and glutes are constantly in control of your position in the center of the saddle.
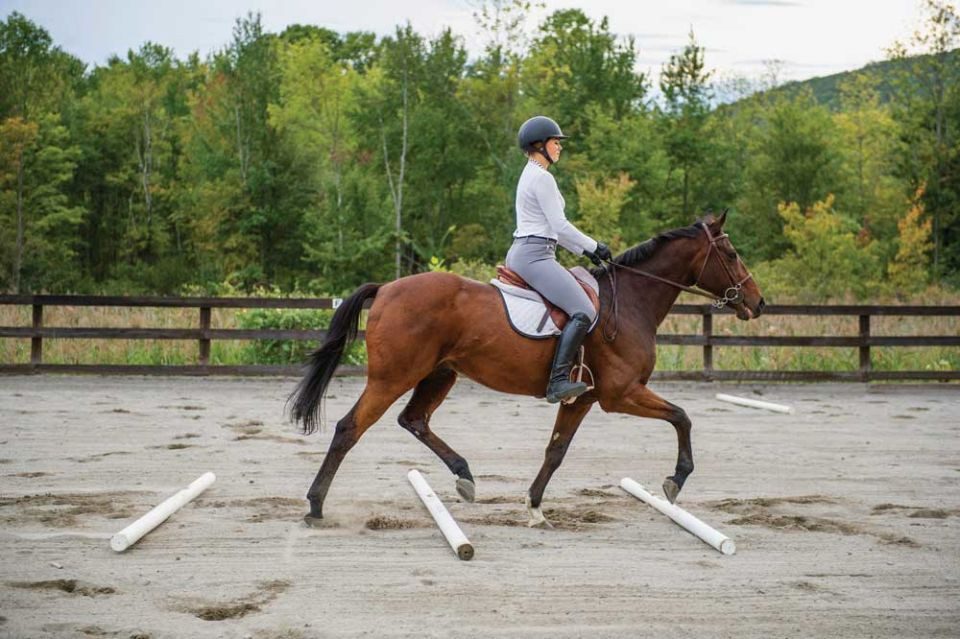
The more stable your seat, the more balanced your body, the softer, clearer and calmer you can ride the reins. In the photo, the rider, due to the good position of the lower leg, works without stirrups along Cavaletti. The horse looks relaxed and calm.
But why do we need such a strong support base?
First of all, if you are a beginner rider, it will (in the worst case scenario) allow you to avoid falls. But its main point is that proper, harmonious riding is impossible without a secure fit, which is 70% dependent on the position of your lower body.
Your heels, shins, sluice, buttocks are the anchor for the body, which allows you to maintain an independent and free position in the saddle, in which you do not need to cling to the horse with your legs, use the reins or saddle as a support. You can work softly hands and achieve effective contact with the horse.
In addition, the lower body absorbs the vibrations of the horse’s back, making your ride comfortable and enjoyable for you and your horse.
Improving your posture is always possible and necessary, no matter what level in riding you have already reached. But first, you need to be critical of yourself.
Rate your fit.
Start by checking your stirrup lengths: They play an important role in the stability of your fit.
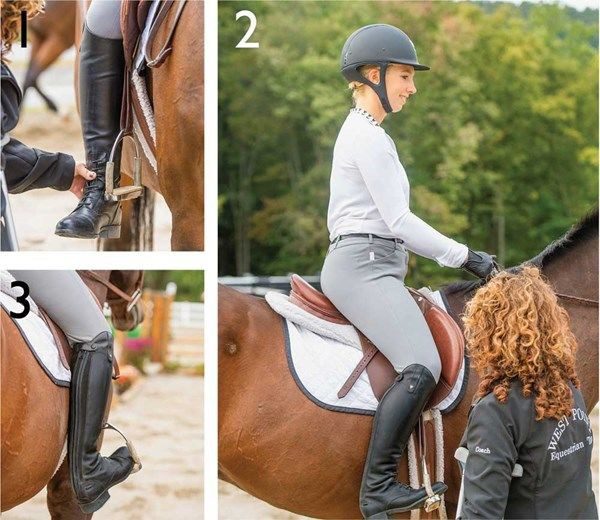
1. To pre-adjust the length of the stirrups for dressage work, drop the stirrups, relax your legs – let them lie along the sides of the horse. The base of the stirrup should be at the level of the ankle bone. If the horse is narrow, you may need to shorten the length of the stirrups by one or two notches. If it is wide or “in the body”, then the stirrups will most likely have to be lowered.
If you plan to overcome obstacles, stirrups are shortened by 1-2 holes.
2. Have a helper assess the position of your feet as you place them in the stirrups. The pad of the thumb should lie on the base of the stirrup, the heel should be lowered down and located under the body.
3. Have an assistant look at the position of both of your legs. The thighs, shins and knees should be at the same level on both sides.
If the legs are correctly positioned and the length of the stirrups is right for you, you will feel comfortable, confident, balanced and balanced in the saddle, and, therefore, will be able to effectively interact with the horse.
If you you feel that your body leans forward, the stirrups are most likely short for you. Make sure that the stirrups are not too long. Adjust their length until you feel comfortable.
Then ask an assistant to make a video of your riding.
Watch the video and carefully analyze your fit.
How is the foot positioned? If it is deep in the stirrup, you will not be able to stabilize the leg.
Are your heels pointing down? Do they stay down all the time or does it depend on what kind of work you are doing? In the second case, it will be possible to say that your landing is not stable.
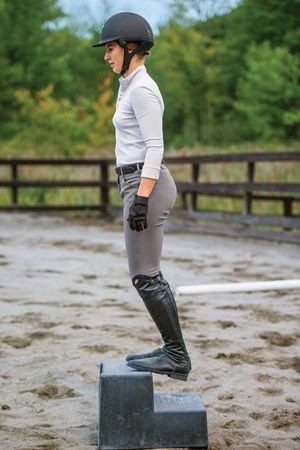
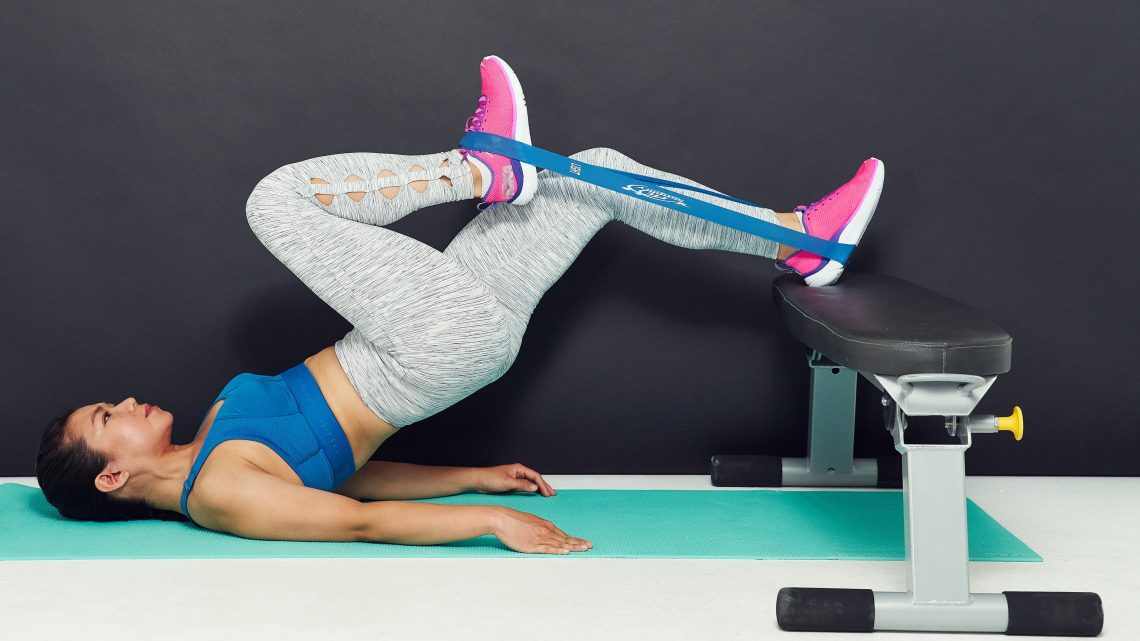
To make the ligaments and tendons of your feet more elastic, which will help your heel drop down, you can do the following regularly: ground exercise.
Take a step (stairs or a curb may also work), stand with your toes on the edge, keep your back straight, bend your shins and lower your heels way down. You should feel your calves stretch. Hold this position for 10 seconds, get off the step, rest for a couple of seconds, then repeat the exercise 10 more times.
Is your schenkel stable Or does it swing along the side of the horse? If it sways, then your body will also sway, balancing in the opposite direction. When your leg goes forward, the body leans back and vice versa.
Can you see the gap between your calves and the sides of the horse? If yes, then this is a sign that you are pinching the horse with your knees.
After analyzing your fit, try to compare it with the fit of successful athletes in your club or top-level athletes. Notice the stillness of their lower body while riding. Try to imitate them during your classes.
Below we will look at some exercises in the saddle and on the ground that will help strengthen and balance your posture. When working on them, do not rush. Exercising to exhaustion will not bring any benefit: your body will unable to maintain the correct position. Plus, your muscles will be sore the next day, which won’t make for a good ride. If you feel tired, end your workout. Over time, as you improve your fitness, you will be able to work longer hours.
Cord lessons.
Lunging is one of the most effective training methods for riders of all levels, and is a great way to work on yourself without risking hurting your horse by pulling on his mouth.
You will need an instructor (or assistant – an experienced lunge) and a suitable horse – calm, with soft, comfortable gaits, trained to work on the lunge. Before the start of the lesson, the horse must first be worked out on the lunge without a rider, move it at a trot and canter.
The rein must be tied up so that it cannot slide down the horse’s neck, otherwise the animal may step into it with its foot and injure itself. Throughout the session, your hands will either be on your belt, or placed apart and raised to shoulder level.
Begin the lesson by working at a calm trot in a formation position. Make sure your back is straight and your body is in the center of the saddle. If all is well, sit in training landing. Ask the lunge to slow down the horse’s trot just enough for you to ride comfortably. Relax your legs and try to sit in the center of the saddle as deep as possible. If you are a beginner, you will most likely be kicked off the saddle. It’s OK! Everyone goes through this.
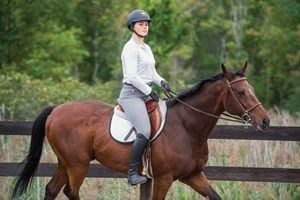
The rider rides at a training trot, her hand on the front pommel of the saddle. To feel more comfortable, take the reins with your outside hand while holding the front pommel with your inside. Pull yourself up to the deepest point of the saddle. Pay attention to how the rider in the photo maintains the correct position of the legs: the weight goes into the heels, the back is straight and stretched.
To get a better idea of what it feels like to be in a training trot, grab the reins with your outside hand, holding the pommel with your inside hand, and pull yourself up to the deepest point of the saddle. If you feel like your back is slumped, tighten your abdominal muscles. Be careful, this action can cause tension in the muscles of the sluice, buttocks and lower back. Try not to let them get too tense, otherwise you will become enslaved and start working against the movement of the horse. Your body needs to stay supple and relaxed, and the right muscles stay toned. This will allow you to move with the horse. The golden mean is a matter of practice. If you feel comfortable sitting at the training trot without a lead, try dropping the stirrups. Maintain the same foot position as with the stirrup. It will also help you rehearse losing the stirrup on the battlefield so that you can keep moving without throwing your horse off balance.
Serpentine using poles.
Place 4-5 poles in a line in the center of the arena. The distance between the poles should be 9-12 meters. The poles are laid out parallel to the long walls of the arena. At the posting trot, serpentine, making 4-5 loops. Align your horse every time you cross a pole.
Let’s take a look at the photos.
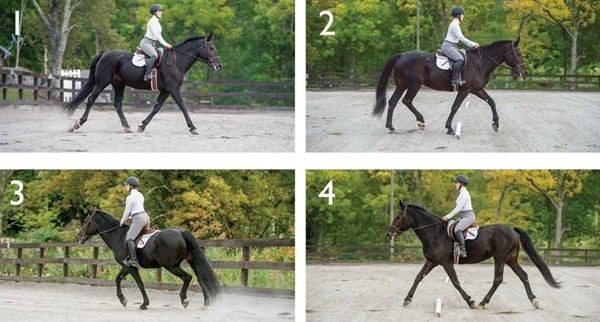
1. As you serpentine, be sure to keep your horse’s rhythm and balance. When crossing the pole, making loops, it is very important to keep the balance of the horse. Pay attention to the photo. The rider does a good job but would like to see a more open hip angle, more dropped heels and more closed hands when she rides in a straight line.
2. Since the rider led the horse smoothly between the loops, she hits right on the center of the pole. But her landing has worsened: the heel goes up, which pushes the leg forward, the body, accordingly, also leans forward. The rider will have time to correct this error when entering the next straight line.
3. Approaching the wall of the arena, the rider redistributes the weight deeper through the heels, this helps her to maintain an upright position of the body during the loop to the left. Notice how she resists the urge to lean in. You still want to see her heel a little lower and her hands more vertical, but this will come with experience. As she goes through the loop, she turns her head to determine the correct trajectory for entering the pole, and rightly so.
4. As a result of working on the previous loop, the rider arrives at the next pole with much better rhythm and balance. Her shins are now in a better position and there is much better contact with the reins.
Work without stirrups on poles.
We rearrange our poles to form a row. Now they lie perpendicular to the long wall of the arena. The distance between the poles is 1,2-1,5 m (depending on the stride length of your horse). Ask a helper to adjust the distance between the poles so that the horse can trot over them in a natural rhythm without shortening or lengthening his strides.
.
1. Athlete rides onto a row of poles, making a turn from the long side of the arena. She drives straight down the center. The balance is very good. But her leg again goes very far back. I also want to see more deeply lowered heels. Hands should be lowered.
The rider passes a row of poles, then continues to move along the center line to the short wall of the arena. On a short wall, she needs to turn left or right, depending on which side she entered the poles before. Alternate the side of the approach each time.
2. After several passes, the rider drops the stirrups in front of the first pole. She moves along the poles, trying to keep her legs in the same position. the angle of her thigh is closed more than necessary, and she looks down, but in in general, a stable and balanced landing is maintained.
After the last pole, she sits in a practice landing and picks up the stirrups. Then he returns to the combat landing again. Also, the rider needs to check whether she is under the right leg. eased before making a short wall turn.
This exercise is great for strengthening your posture and also teaches you to keep going when you lose your stirrup. If you are an experienced rider, try the same exercise at a training trot.
Many riders find it easier to sit in the training trot without stirrups because it forces them to balance with their bodies.
The training trot without stirrups is an excellent exercise in itself. To make it harder for yourself, try sitting for one measure and easing for two measures. Do this first with stirrups, and then without them.
We complicate exercises.
Jumping without stirrups. Always think about safety, jump only on calm and experienced horses. Start with simple obstacles and gradually increase their difficulty and height. Start with a single pole placed on the ground, perpendicular to the long side of the arena. First go on it with stirrups, then without them.
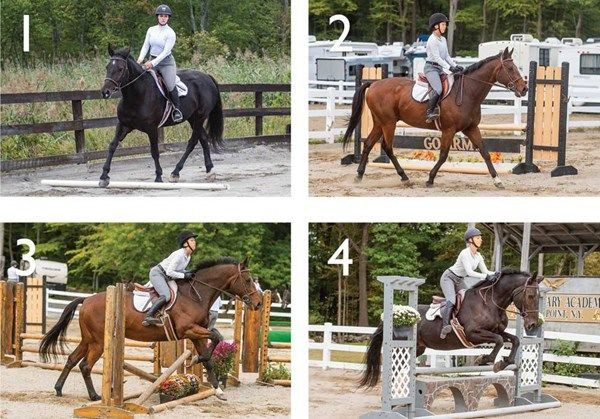
1. You can practice riding without stirrups on a pole placed on a 20m circle. First, do the exercise a few times with the stirrups, then drop them. If you feel confident at the trot, you can try the same work at a canter, first with stirrups, then without.
Many horses simply pass the poles without making a jump (at a canter, doing a normal cantering beat), so there is no need to give a rein. Just stay supple and sensitive at the hands, follow the horse’s mouth. Sit straight and calm, do not prepare for the pole, walk it as if it were not there.
Then ask the assistant to add another pole to the circle at a few paces from the first. Adjust the distance according to your horse’s stride length.
2. Now you can try climbing without stirrups small cavaletti or crosses Try to ride as if you were working with stirrups. Maintain balance and rhythm. In the photo, the rider drops her stirrups as she approaches a small barrier. Her heels are in a great position, down, but her legs could be moved back a little, and her shoulders more open.
3. In the suspension phase above the cross, the rider closes her knees instead of using the sluice. This causes her legs to move far back and her hips to go forward. To compensate for this, the rider tilts her head back. Her shoulders can still be more open and her arms softer. All these shortcomings require time and hard work, but they are not critical.
4. If you feel confident overcoming cavaletti and crosses, try jumping over a short chinok. On each jump, focus on keeping your feet in the correct position. For many riders, when overcoming obstacles without stirrups, the legs go back. This, in turn, causes the body to lean forward. Therefore, pay attention to your legs – they should remain under your body, slightly behind the girth. This task is more difficult than it seems. The rider in the photo, in principle, maintains a good position. But you can see that the angle between the knee and the calf straightens too much. This caused the body to move far from the saddle and the rider to lose contact with the horse’s mouth (although of course it’s better to drop the reins than to hang on to the horse’s mouth). AT next time this girl will need to work on hip and leg position to keep her body from moving up from the saddle. This will give her stability and the ability to maintain contact.
Also note: the rider closed her eyes, and this should not be allowed.
If you want to achieve good results, take the time to work on the landing every day, regardless of your level of training. There is no limit to perfection in strengthening the landing!
Sherry Cashman; translation by Valeria Smirnova (source)
 Asia_Tainaya 7 April 2017 city
And where are the exercises on the ground?) Answer
 Maria 7 April 2017 city
Below the corresponding picture:
To make the ligaments and tendons of your feet more elastic, which will help your heel drop down, you can regularly perform the following exercise on the ground.
Take a step (a ladder or a curb may also work), stand with your toes on the edge, keep your back straight, bend your shins and lower your heels down. You should feel your calves stretch. Hold this position for 10 seconds, get off the step, rest for a couple of seconds, then repeat the exercise 10 more times. Response
 Asia_Tainaya 7 April 2017 city
Thank you very much, I did not notice right away)


