How to remove stitches from a cat at home?
Contents
Which stitches can be removed and which can’t?
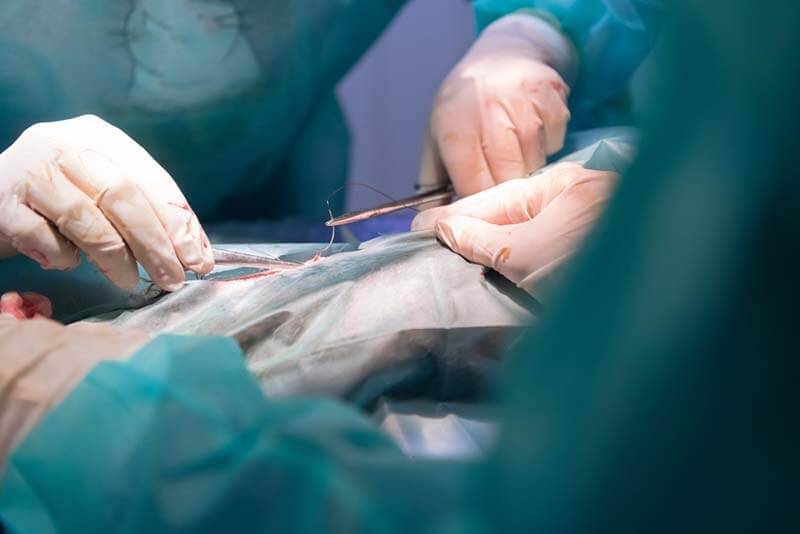
Stitches may be placed for a variety of reasons. They are superimposed both on surgical incisions and on wounds resulting from injuries. The sutures are skin, superimposed on the mucous membranes of the eye and cornea, genitals, muscles, internal organs.
It is allowed to remove well-fused skin sutures on your own, if the doctor who applied them considered it possible.
Most often we are talking about the removal of sutures after ovariohysterectomy, that is, sterilization.
Have your doctor place a dip (cosmetic) suture with an absorbable suture. These stitches do not need to be removed.
Under no circumstances should stitches be removed:
Submersible They don’t need to be removed.
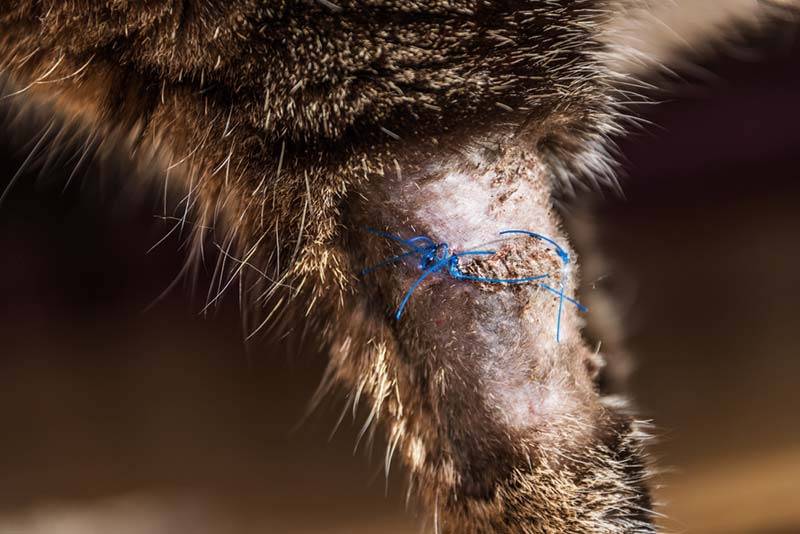
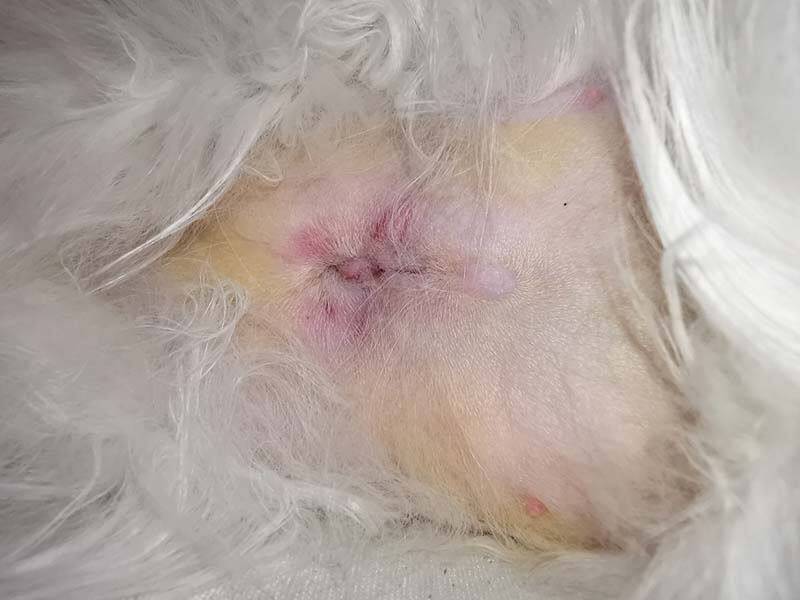
with signs of inflammation – swelling, redness, itching, unpleasant odor, when something flows from the seam, it worries the cat. All these are signals for urgent medical attention.
Insolventin which the edges of the wound did not grow together. Such a suture probably requires surgical debridement and reapplication.
Seams with installed drainage systems – tubes, rubber bands, gauze sewn into the wound to drain fluid from it.
If the animal develops systemic signs of postoperative complications. For example, lethargy, refusal to feed, unwillingness to move, severe pain.
How to understand when the seam can be removed?
About 10 days have passed since the operation (more precisely, the doctor who applied them will say)
Removal of stitches in a cat after sterilization is usually allowed after 10-14 days
Seam dry, clean
He completely screwed up.
Preparation for suture removal
By far the hardest part about removing a cat’s stitches is making sure she doesn’t hurt herself or you when she’s stuck.
In order for the procedure to be quick and painless, you will need:
Two assistants
Stable table with access from at least three sides
Good lighting
Disposable gloves
Surgical gauze, sterile wipes
Alcohol or strong alcohol
0,05% solution of chlorhexidine bigluconate
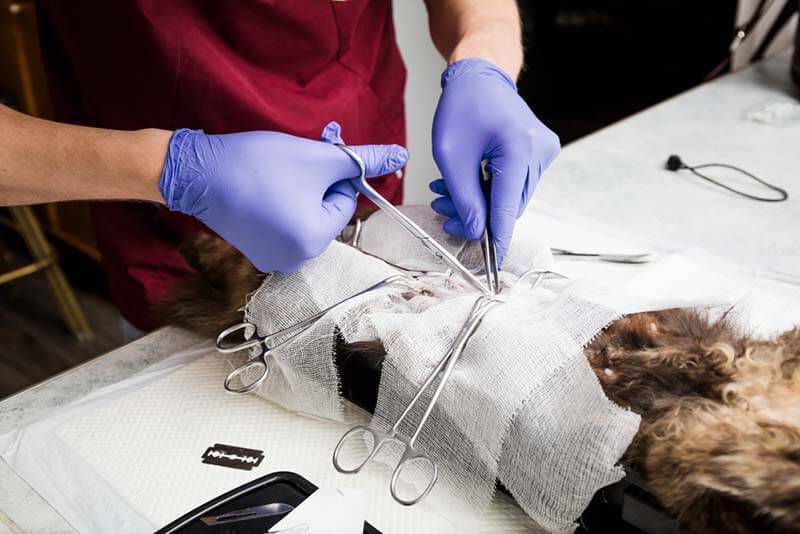
Small sharp scissors with rounded ends
Tweezers (preferably surgical, but any other will do).
How to remove stitches in a cat after surgery – instructions
Put on gloves, treat your hands with an antiseptic (alcohol, strong alcohol).
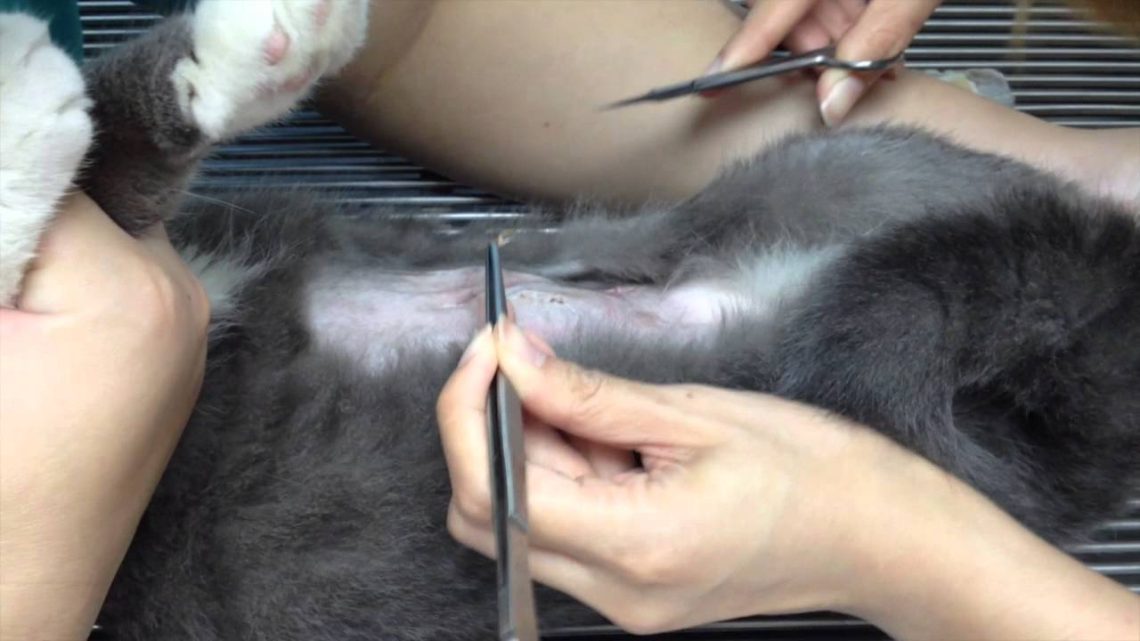
Assistants fix the cat. One holds it in the area of the withers (by the scruff) and the front paws, the other holds the hind paws and turns the patient around the area of interest to you. If we are talking about a suture after sterilization, for example, then sometimes it is necessary to spread the hind legs or tighten the fat fold of the abdomen so that it is convenient to manipulate the suture with both hands.
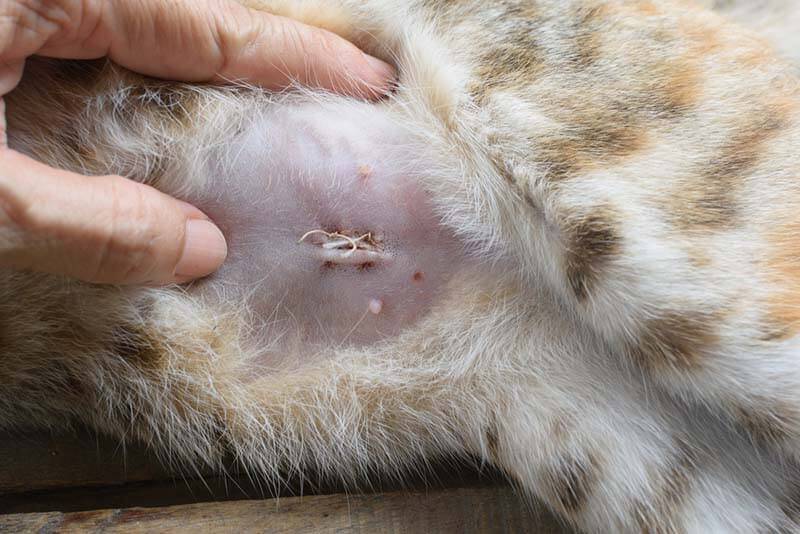
Inspect and feel the seam. If it has grown together well, no signs of inflammation are visible around it, then it can be removed. If something is alarming – the skin around the seam is swollen, reddened, swollen, it smells bad, there is a copious discharge – you need to see a doctor. When the due date (about 10 days) has passed, and the edges of the wound have not grown together, then only a veterinarian can solve this problem.
Wipe the seam with an aqueous 0,05% chlorhexidine solution using a gauze pad.
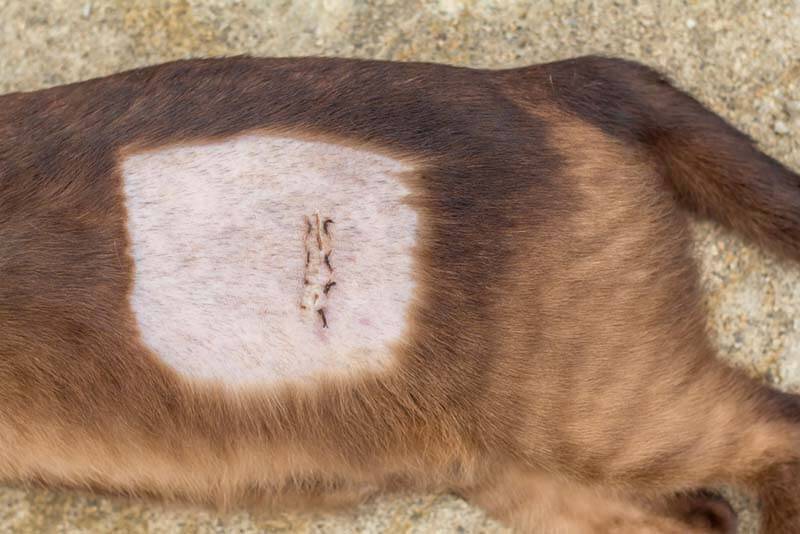
If the seam is knotted, then it consists of separate stitches with one knot. This seam is simple, consisting of two injections and a knot, or complex, having a p- or z-shape and 4 injections with one knot. To remove the knotted seam, you need to pick up the ends of the threads from the knot with tweezers or fingers, pull them away from you and up, cut the thread as close to the skin as possible, stepping back from the knot as far as possible. Next, you need to press the skin to the body of the cat, and pull the thread. So the thread will stretch, causing the pet minimal discomfort.
If a continuous suture is applied (which has two knots – at the beginning and at the end of the surgical wound), then each stitch will have to be cut, and it will be extremely problematic to do without tweezers, since the edges are not visible, it is difficult to pick up the thread with your fingers. First, we catch the knot with tweezers and pull it up and away from us, then we cut off the first thread as close to the skin as possible. Next, we remove each stitch separately: we hook it with tweezers, fix it, cut the thread between the skin and the knot as close to the skin as possible, pull the thread. Be sure to remember to remove the last knot.
Treat the seam with a 0,05% aqueous solution of chlorhexidine.
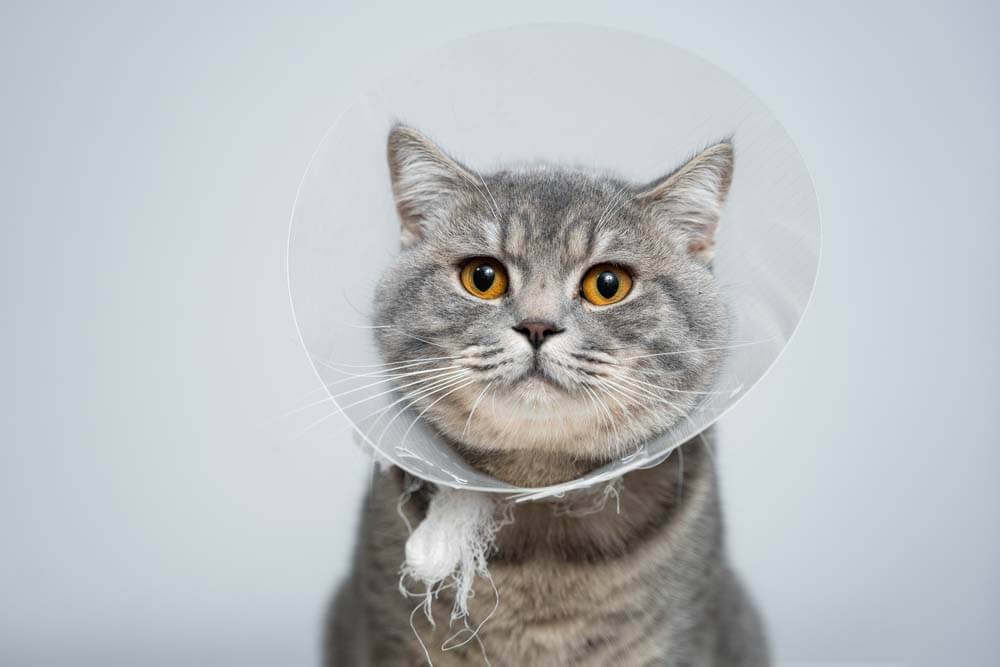
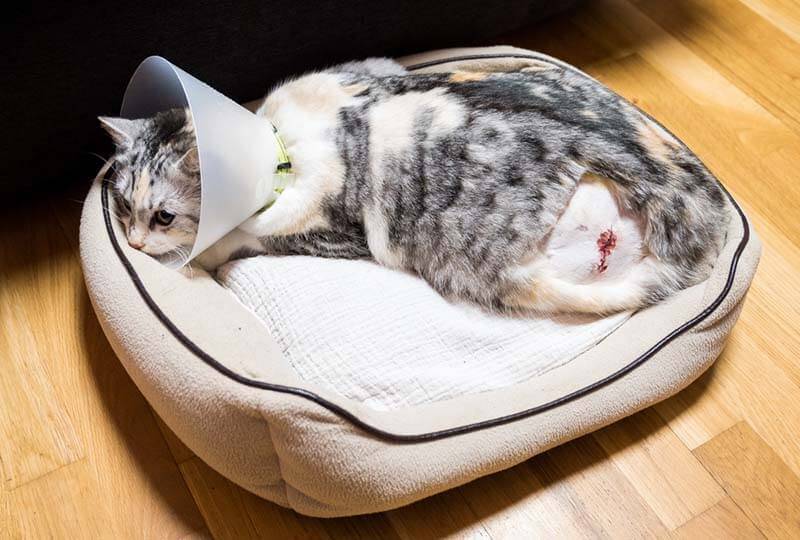
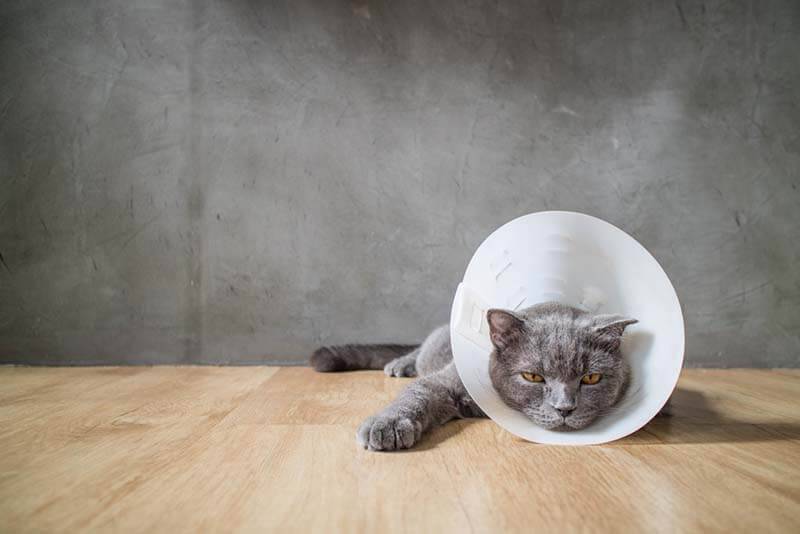
Put a blanket or collar on the cat so that it does not lick the fresh seam. A couple of days after removing the threads, it will be possible to remove the protection.
Now you know how to remove the stitches in a cat yourself at home.
Possible errors and complications
The most common mistake is premature removal of the suture in a cat. If you remove the first stitch and see that the edges of the wound are coming apart, stop. Careful inspection and palpation before the procedure will help to avoid this situation. Sometimes, when examining a suture after sterilization or other abdominal surgery, various bumps and seals are found under the skin. This can be a variant of the norm (this is how a scar is often formed on the abdominal wall), a relatively safe complication (the formation of a cavity in which blood and / or lymph collects). But sometimes such a finding can also be a symptom of a life-threatening situation – a divergence of internal sutures or the formation of an abscess. In any case, you need to see a veterinarian immediately.
Often, when trying to remove the seam, the owner is injured from the teeth or claws of the pet. Only a neat but strong fixation will help to avoid this.
If you are not sure about the assistants, then contact the specialists.
It happens that a seam or a separate thread is missed. In this case, ingrowth or rejection of the suture material can occur immediately or after any time, sometimes even years. The problem is solved only after examination by a veterinarian.
It happens that they didn’t put on a blanket, and the cat licked the postoperative scar. The development of events depends on the extent of the injuries received. If the skin is intact, then it is enough to wipe with chlorhexidine and put on a collar. If it is badly licked, then, unfortunately, only a doctor will help. Most likely, it will need to be changed.
Iodine treatment is a common cause of complications. In no case do not treat the seams with a solution of iodine, the cat’s skin is very sensitive to it.
Tips
Removal of sutures in a cat after sterilization is not required if a dip suture is applied. Ask the doctor to apply just such a suture before the operation, this may slightly increase the cost of the operation, but will greatly facilitate postoperative care.
If the suture material is very tight to the skin or there are dried dry crusts on it, Levomekol ointment will help. Lubricate the seam liberally with it 10-15 minutes before removal, and the procedure will be easier.
There are cat muzzles. They are comfortable, but they do not show how the patient breathes. Be prudent when fixing a cat, monitor the condition of the animal.
Trim the nails a day or two before removing the sutures, this will greatly facilitate the procedure.
Be sure to discuss with your doctor that you plan to remove the stitches yourself. Your doctor will tell you how many stitches you have had and when they should be removed.
care note
The sutures applied to surgical wounds do not require antiseptic treatment; it is enough to wipe the suture with saline sodium chloride solution in the first days, if there is discharge or crusts. Such wounds are clean, there is no point in antibiotics and aggressive antiseptics, the wound will not become cleaner after their application. But the speed of recovery can be significantly reduced due to their irritating and aggressive effects.
The main danger for a cat’s seam is its own tongue. It is rough, and the animal will easily remove the threads, injure the skin around the seam. Moreover, his oral cavity contains a lot of microorganisms that can have a bad effect on the wound. Protect the seam from licking!
If the doctor has prescribed the wearing of a postoperative blanket or collar, then they cannot be removed all the time the wound is healing.
Cats eat well in collars, but the bowl should be stable and smaller in diameter than the collar itself.
Answers to frequently asked questions


You May Also Like
Scabies in cats
Liver failure in cats and cats