We bandage the horse’s legs: how and in what cases?
We bandage the horse’s legs: how and in what cases?
There is probably no horse that has not needed a leg bind at least once in its life. There can be many reasons for bandaging! But the main thing to remember is that the wrong application of a bandage can lead to many problems. The key to successful bandaging is choosing the right materials and applying them correctly.
Before you start bandaging, pay attention to some basic principles of bandaging:
1. Necessity
You need to know why and why you bandage your horse. Bandaging may be recommended in the following cases:
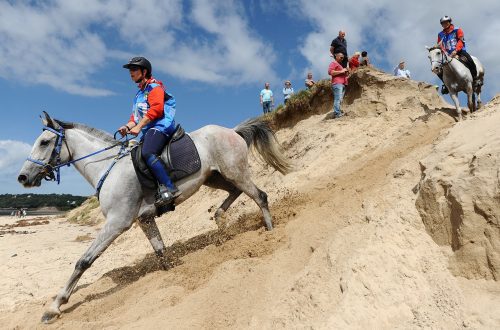
support for tendons and ligaments during strenuous workouts;
prevention of development or the need to take measures to reduce swelling of the leg after training or after injury;
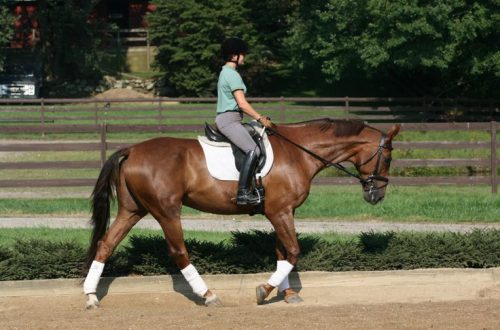
protection of legs from blows;
protection of the wound from contamination and aid in healing;
·transportation.
If you have any doubts about the need for bandaging, consult your veterinarian!
2. Security
Do you know that you need to bandage the horse’s legs, but the horse is nervous, frightened, or you know in advance that he will not take this procedure calmly? If there is no time for habituation, use a sedative. For example, Dormosedan Gel® (detomidine hydrochloride).
A person bandaging a horse should not kneel or sit on the ground – you need to be in the safest position, be ready to jump away if necessary.
3. Accuracy
When starting bandaging, be careful, pay attention to details, strictly adhere to the bandaging technique.
Regardless of the reason for bandaging, proper bandaging must be used. machinery. If used incorrectly, bandages will not perform their functions. They can cause discomfort to the horse, restrict blood flow, and even damage tendons and other tissues.
In most cases, it may be true to say that it is better to leave a horse’s leg unbandaged than to bandage it incorrectly.
Fortunately, there is nothing complicated in the technique of bandaging a horse’s legs. You just need time and practice.
It is better to apply a bandage more loosely than too tight. A good test to see if the leg is bandaged at the correct bandage tension is the tapping method. A properly applied bandage, when clicked, should make a sound similar to what you hear when clicking on a ripe melon. The sound of impact may differ depending on the material of the bandage, but the general idea is that the surface to be “thumped” should be uniformly tight.
When bandaging, consider the following key recommendations:
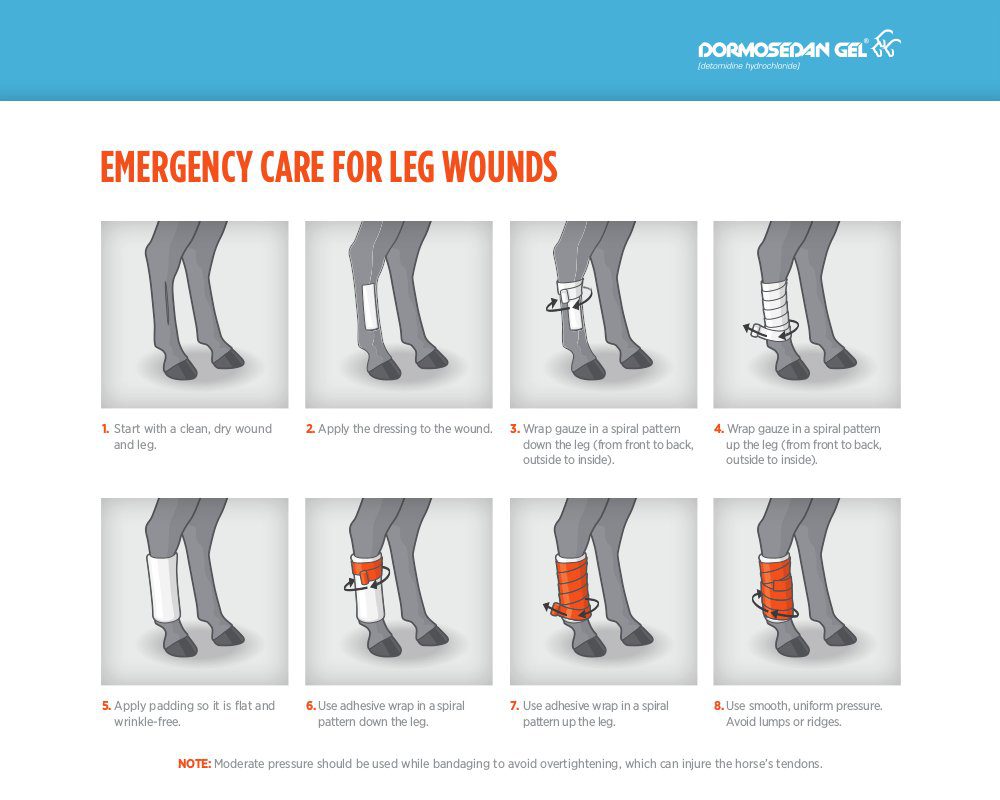
1. Feet and bandages must be clean and dry! If there is a wound on the leg, make sure it is cleaned, washed, and covered with a bandage or protection as recommended by your veterinarian. Sawdust, straw, dirt and moisture can irritate the skin and increase the risk of wound infection.
2. Use a soft, clean padded jacket to protect your foot under the bandage. Bandage so that the bandage lies flat without creating wrinkles. Try not to use old, worn pads – they can clump and form wrinkles, creating additional areas under the bandage with increased pressure under the bandage.
3. Start bandaging from the inside of the pastern at the fetlock. Do not fully grasp the joint, as this will loosen and dislodge the bandage during movement.
4. Bandage from front to back, from outside to inside (counterclockwise on the left legs and clockwise on the right).
5. Wrap the bandage in a spiral, down the leg and back up, overlapping the previous layer by half.
6. The pressure should be constant and sufficient so that the padded jacket and bandage do not move. Make sure there are no wrinkles!
7. Do not overtighten the bandages, do not allow high pressure points to appear!
8. Make sure that the bandage is not too loose – it will twist, wrinkles may form under it, it may unwind (all this can injure the horse!).
9. The padded jacket and bandage should cover the rim of the hoof to protect this part of the leg (especially when transporting).
10 The padded jacket should be visible from under the bandage at least 3,5 cm from below and from above. If there is a possibility of sawdust getting in (undesirable), cover open areas with adhesive tape.
A well applied bandage will look neat and complete. Ask your veterinarian or experienced horse rider to show you how to wrap your horse’s legs properly, and practice a little under supervision before you do it yourself.
Below we will talk about features of bandaging various areas of the horse’s legsand bandages for special purposes.
Hock bandage
The hock and carpal joints are the most difficult to bandage. Care must be taken not to overstretch the joint where the bones protrude and pass close under the skin. Otherwise, you can injure the horse.
Do not apply the bandage directly to the point of the hock and the bony protrusion on the inside of the leg directly above the hock.
Here and below, the numbers of figures correspond to the numbering of paragraphs. Pay attention to hand positions!
1. Apply a medical gauze pad and make a couple of turns over the hock with an elastic bandage.
2-4. Descend below the point of the hock and complete two more rotations.
5. Spray a tincture of benzoin over the area above the elastic bandage to help the self-adhesive elastic bandage stick to the coat.
6. Rise 15 cm higher from the beginning of the medical bandage and apply two turns of an elastic self-adhesive bandage.
7. Spiral down, but do not bandage the Achilles tendon. After about three turns, place two soft gauze rolls on each side of the tendon to fill in the holes just above the hock point.
8-10. Continue down the spiral, overlapping the rolls, and then back up. To prevent the bandage from coming loose, you can grab it with duct tape.
Wrist bandage
Be careful not to crush where the bone protrudes and is close to the surface of the skin!
1. Apply a medical gauze pad and make a couple of turns with an elastic bandage over the carpal joint.
2-5. Make about 12 turns with the figure “8” around the joint.
6. Spray a tincture of benzoin over the bandage to help the self-adhesive elastic bandage stick to the coat.
7. Rise up 15 cm from the beginning of the elastic bandage and apply two turns of self-adhesive elastic bandage.
8. While bandaging down, maintain even tension on the bandage.
9. Continue wrapping around the carpal joint, being careful not to cover the ridges where the bone passes close under the surface of the skin on the inside of the joint and behind.
10-12. Continue bandaging until the number of layers reaches four, ending at the top of the carpal joint.
Bandaging of the forearm
Wounds on the forearm of a horse are difficult to bandage due to the tapered shape of the forearm (which makes the bandage slip off).
1. Make sure the foot is clean, dry and ready for a normal bandage.
2. Place two or three strips of duct tape vertically down along the forearm.
3. Put on a medical gauze pad and wrap it with an elastic bandage, starting from the middle of the forearm in a spiral down and then up.
4. Wrap cotton around your leg.
5. With an elastic self-adhesive bandage, start bandaging from the middle of the forearm down to the edge of the cotton backing, secure the bandage. Secure the ends of the bandage with adhesive tape. Remember to go down the leg, then up and back to the middle.
Bandaging the metatarsals (or metatarsals)
1. Make sure the foot is clean, dry and ready for a normal bandage.
2. Apply a medical gauze pad and start wrapping the top with an elastic bandage.
3. Gradually bandage, moving down.
4. Go back and bandage up, move up over the wound.
5. Finish well above the wound, just below the carpal (or hock) joint.
6. Complete the initial bandage.
7. Apply padding to relieve pressure.
8. Align the ends of the padded jacket well.
9. Start bandaging with a self-adhesive elastic bandage from the middle of the metacarpal (or metatarsal) bone.
10 Continue bandaging in a spiral down the leg.
11 Continue bandaging, go up and back to the center.
12 Press the end of the bandage well to the already wound one so that it sticks well and holds.
Bandaging for a long time
This bandage is used for many tournament horses during tournaments (a horse can actually be in such bandages all day). The bandage must be clean, bandage tightly, avoid wrinkles.
The main function of such bandaging is to provide protection and support for the legs. The horse is also bandaged if there is a need to apply various rubs, ointments, fluids, etc.
Transport bandage
There are many protective equipment available to ensure the safety of the horse’s legs during transportation (starting from simple “boots” that cover only the metacarpus or metatarsus and are attached with simple Velcro, and ending with protective boots that cover almost the entire leg, including hock and tarsal joints).
If you use boots that protect the entire leg when transporting, select them according to the size of the horse and note that they should be made of dense material and cover the hock / carpal joint and hoof corolla for a couple of centimeters.
If you prefer to bandage the horse for transportation, cotton bandages 15 cm wide and 3-4 meters long are the best option. When bandaging, maintain a constant tension, each layer should overlap the previous one. Try to always bandage so as to break the rim of the hoof.
Translation by Valeria Smirnova based on site materials http://www.horsechannel.com и http://articles.extension.org.


