Pumping muscles: 10 exercises
We swing muscles: 10 exercises
Our expert Amanda Sutton is a Physiotherapist with a Master of Veterinary Medicine. She was the official Physiotherapist for the British Eventing Team. Now practicing in Littleton, Hampshire, she works with veterinarians on the treatment and rehabilitation of horses. In addition, he lectures all over the world.
“A horse must be stable in all gaits,” says Amanda Sutton. “Most riders put a lot of effort into getting the horse to move properly by pulling the abdominals in while maintaining muscle tone. Whether the horse is working under the saddle or not, he must move easily and confidently, which in turn will help to avoid injury.”
Exercises
Amanda has developed a series of simple 10-minute exercises to help your horse become more stable and develop his sense of balance. “These exercises can be done daily with ease. And some you can do when you lead a horse from the field to the stable, says Amanda. – However, if the horse has not been in work for a long time – for example, standing with an injury – consult a veterinarian. Vary your exercises and don’t get carried away.”
1. We work with the abdominal muscles.
This exercise gives a good load on the horse’s spine and fixes his pelvis in the correct position. The only “but”: before doing it, make sure that the horse does not hurt anything in this area. Typical signs of pain are twitching or muscle stiffness. So, let’s begin.
Stand the horse straight so that his legs are exactly in line with the body.
Gently place your hands on her stomach and let her get used to being touched. Move your hands over your stomach and around the girth area.
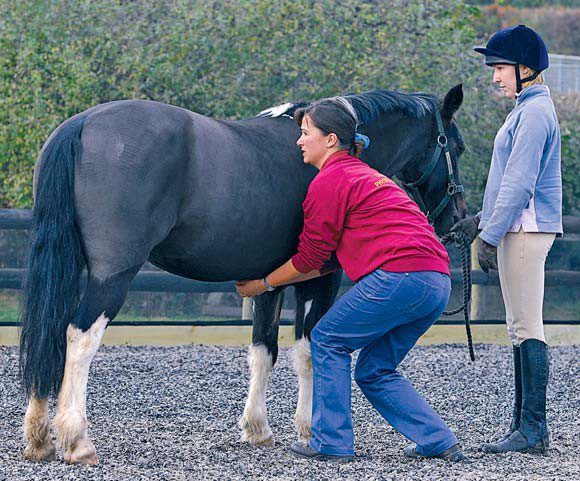
Place your hands under the horse’s belly and gently press down on it, then lower it.
The pressure with the hands should be strong enough to push the horse’s belly up. Look at the withers to determine if the abdominal muscles are tightening or not. Tension, relaxation – sometimes 3-4 seconds can pass between these phases. Repeat the exercise 3 times. Don’t let the horse move.
2. We train the muscles of the hind legs.
Stand up straight. Stand on the side and lift her back leg a few inches off the ground.
Grasp the tail and gently and slowly pull it towards you a few centimeters. Hold on and let go. The rhythm is: one-two-hold, three-four-let go. Repeat 3 times. Then slowly take the same leg and rotate it clockwise, moving only the lower part. Repeat in the opposite direction. Each rotation should take approximately 10 seconds.
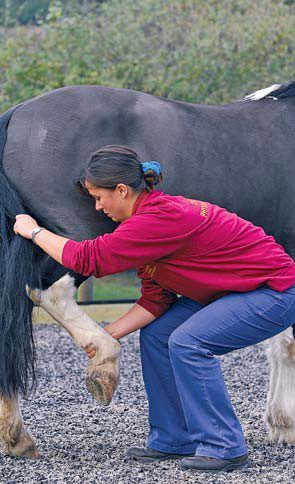
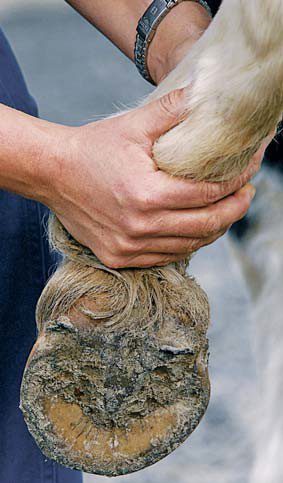
Make sure that the other leg does not bend. If this happens, put your foot back and let the horse rest.
Repeat the exercise with the other leg. Do this exercise 3 times clockwise and 3 times counterclockwise.
3. Muscles of the croup.
The horse must stand straight. Sami stand on the side next to the croup. With fingers, actively massage to the right of the sacrum, starting from the highest point of the croup to the tail.
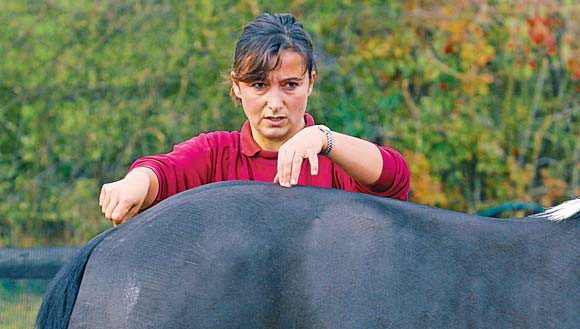
Press your thumb on the soft tissue at the highest point of the croup and slide it towards the tail (see photo). The other hand is on top of the croup, and you can feel the back of the horse rise. Perform this exercise on the count of “one-two”, take a short break and repeat everything again. In total, you need to do 2 times on the right and left.
4. Front legs.
When you lift the horse’s front leg, watch what happens to the back leg on the opposite side. If your horse is pinched, the leg will move forward. In this case, put your front foot back in place and start again. To do this exercise, place one hand behind the horse’s elbow joint, keep your back straight, pull in your belly, and grab the horse’s leg with your other hand. “Draw” a circle with your knees, and in this way the horse’s leg will move in a circle.
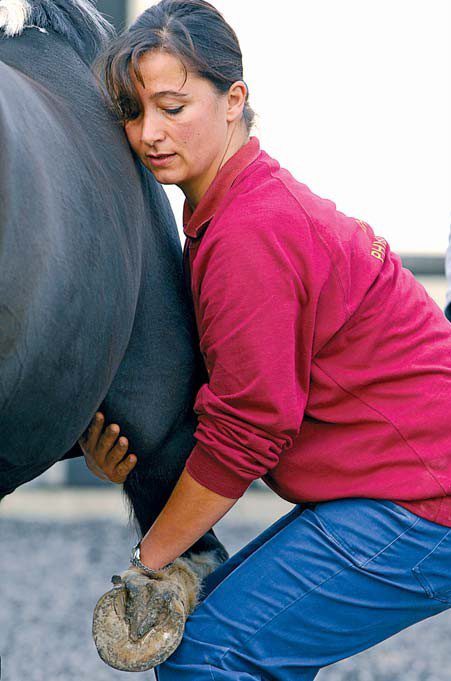
Rotate the lower leg for 5 seconds, then change direction. Repeat the exercise with the other leg.
5. Shoulder relaxation.
The muscles in the shoulder area can be very tight, but horses generally enjoy this exercise. In addition, it helps to increase the reach of the front legs.
With one hand, grab the front leg of the horse, and place the other on the back in the place where the saddle usually rests, right behind the shoulder blade (see photo). The fingers should be spread out to the side.
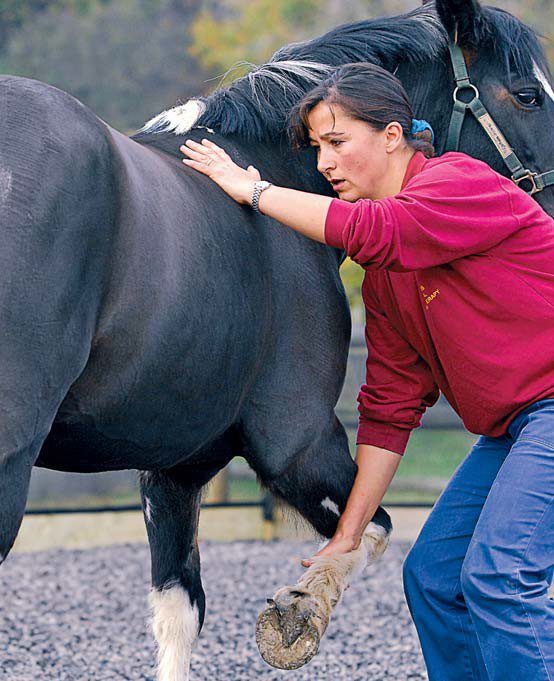
Squat down slowly so that the horse’s leg goes down. Keep the horse’s leg bent and, after counting to five, release.
If the horse falls on you, it means that he did not understand you when you let go of his leg. Calm her down with your voice. If you feel that the horse’s shoulder is not dropping, gently raise his leg, and then lower it.
Repeat this exercise 3 times on each side.
6. Turns.
This exercise will help the horse learn to turn properly by relaxing the neck and engaging the hind legs. Do it as slowly as possible. Most riders pull too hard on the inside rein when turning, causing the horse’s neck to curl too much. We will practice bending the horse’s neck naturally and freely.
Stand on one point. Your torso and arms should form a V shape. Riding to the left, your left hand holds the lead and stays in front of the horse’s nose. You should be in line with the horse’s inside front leg, and your right hand should be at the level of his last rib.
Start the exercise with your left hand showing the direction of travel and your right hand pushing the horse forward and around you. The lead hand must remain in front and force the horse’s inside leg to come under the body, crossing over the other leg. Do not pull the horse in a circle, but only forward, while the other hand pushes the horse from behind.
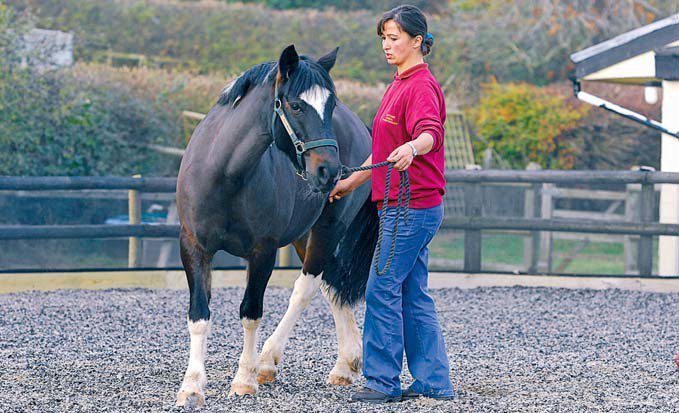
With your dominant hand, “ask” and with the other hand, push the horse forward around you.
Observe the horse and try to identify problem areas.
Focus on building more momentum and then stop and take a break. After completing the circle, rest. At the end of the movement, stop pulling the lead – just raise your hand and say “oh-oh-oh.” Repeat the same on the other side.
Here are the signs by which you can determine that the horse is having a hard time doing this exercise: he tails, he drops his head a lot, he throws his butt out, he cannot put his inside hind leg under the body, which crosses with the other hind leg; you have a “wooden” feeling in your hand. In these cases, repeat the exercise while keeping a close eye on your own actions. Perhaps you didn’t concentrate enough and didn’t coordinate your own movements well, and therefore you couldn’t get the horse’s hind legs to work.
7. Ribbon.
For this exercise, put a saddle on your horse and a small veterinary tape or bandage – but only when your horse is no longer in the stable and can relax. I use a material called “Thera-Bend” which is thin and stretchy. In physiotherapy, it is used as a resistance material. Do not take narrow or too tight bandages. The tape will give the horse a sense of feedback. (Please be aware that because some veterinary tapes are adhesive, horses may not like them.)
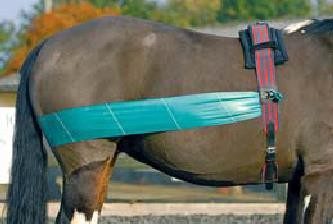
First, show the horse a long whip or stick, which will be like an extension of your hand. If your pet is very afraid of the whip, do not take it.
Cut the tape just enough to attach it tightly to the saddle on both sides. Before you tie the band, stand up straight and do Exercise 1 (“Abdominal Workout”). This will help her focus on the position of her own body. If she gets up wrong, she will feel resistance and return to her original position, in which the tape does not interfere.
Lead the horse in your hands so that he gets used to the tape. Use your hand to show the direction of travel and push the horse forward with the whip either over the hind legs or over the last rib, commanding “go!”.
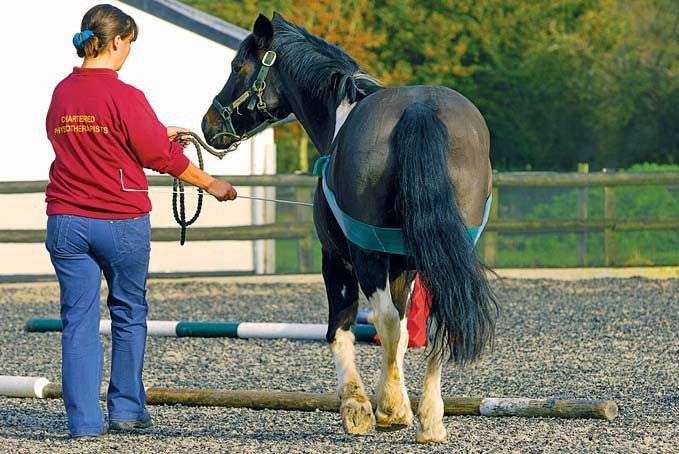
While walking next to the horse, do half halts. Use the whip to help stop the horse by placing it in front of the horse’s nose or chest. At the same time, say “oh-oh-oh” while slowing down.
To make a turn, repeat exercise 6 (“Turns”) using the thick end of the whip (at the level of the last rib). Force the horse’s inside hind leg to cross over the outside by pressing on the horse’s side behind the last rib.
8. Short and convenient.
If the horse is young, do this exercise with one pole, gradually increasing the number to three.
You will need a row of three poles one meter apart. Walking over poles that are so close to each other stimulates the horse’s abdominal muscles and forces his legs up and forward.
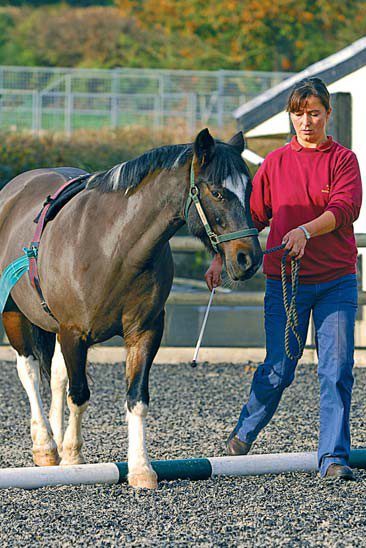
Keep your lead hand close to the horse’s nose, each time changing direction and forcing the horse’s inside hind leg to cross over to the outside and under the body. Then raise the second and last pole at one end a few centimeters off the ground and repeat the exercise, each time changing direction and doing a half halt in front of the first pole. For adult horses, vary this exercise by doing a half halt in front of the first pole and in the middle.
9. Serpentines.
Make the loops of the serpentine intentionally large, without going forward and staying close to the horse’s shoulder: this will force the horse to stretch his head forward and work the back of his head.
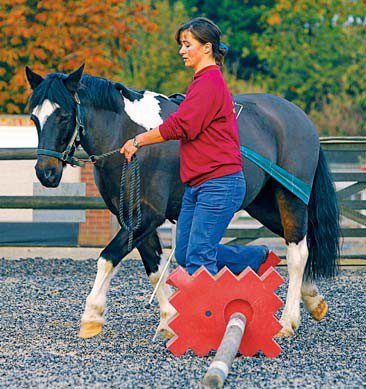
In the turn, your inside hand should not allow the horse to fall inward. And the horse’s inner leg will cross with the outer one. As the horse gets better and better at the exercise, increase the difficulty by decreasing the angle of rotation.
To slow down your stride, do half halts and use the whip in front of the horse’s chest.
10. Reinsertion between the poles.
It is often difficult for a horse to rein in, because not all horses are mobile. They drag their front legs or pull the body back. Let’s try to get the horse to think about how best to start the movement and how best to raise the front legs while “connecting” the shoulder.
Place two poles on the ground and lead the horse towards them, while looking ahead along the trajectory of movement, as if you were approaching an obstacle in show jumping. Stand the horse exactly between the poles.

Place one hand on the horse’s chest and push him back while saying “back” so that he reins in between the two poles. Then relax your hand. Repeat this gesture.
If the horse is having a hard time, praise him for the slightest effort to go back, then stop and walk forward.
Ask the horse to stand over the pole so that he moves his front legs over it. Place your hand on the horse’s chest and ask him to walk backwards, stepping over the middle of the pole. Stop, walk forward, and then repeat.
Tips:
● Never stand near the horse’s hind legs, as he may strike (if the horse strikes, this may be a sign of some kind of discomfort that needs attention).
● Your every movement should be fully controlled and as positive as possible. Weak horses want to do everything quickly, but if you make them do everything slowly, you will achieve more.
● Many of these exercises can also be done on the lunge or on the reins.
● It may happen that a young horse has never seen a pole or a long whip before, so introduce him to them before you start.
● Walking over poles can be a bit tiring, so don’t overdo it. Don’t do more than three sets at a time.
● Older horses can do these exercises one way better than the other, but your goal is to do the same amount of them on both sides until the horse develops the weaker muscles.
● If the ground is sticky and uneven, your task becomes more difficult. The best place to practice is a field with soft ground. It is best if it is herbal. Weaker horses will do better on such ground.
The material is published with the permission of the copyright holder – the magazine “MyHorse” (“My horse”).
Amanda Sutton


