How to make an aquarium (aquaterrarium) for a red-eared turtle with your own hands at home
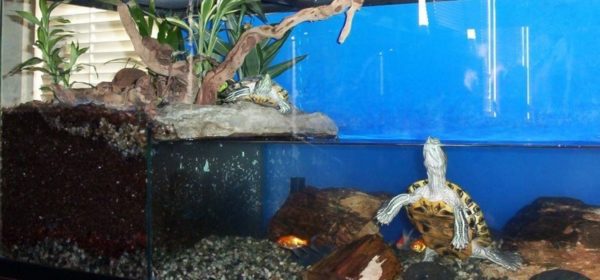
To keep adult red-eared turtles, a fairly large terrarium is required. Finding the right device can be difficult, and the cost can be a significant blow to the family budget. The best solution would be a homemade aquarium (aquaterrarium) for a turtle – to make such a device does not require special knowledge or expensive materials.
Contents
Dimensioning
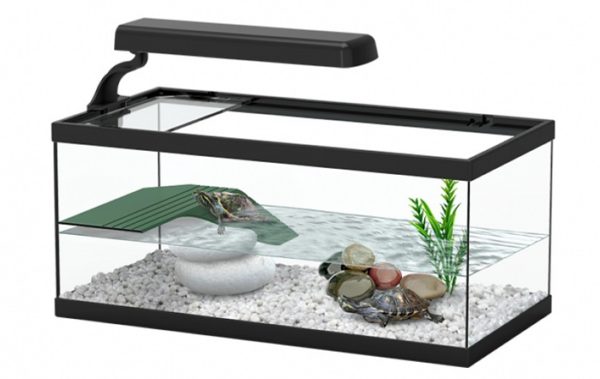
For ready-made aquaterrariums from a pet store, it can be difficult to find a suitable place in a small apartment. With self-manufacturing, you can make the dimensions and shape of the device such that it can be conveniently located on the available area. When drawing up a drawing, it is important to remember that adult red-eared turtles need a dwelling of impressive size, especially if several individuals are kept together. So for a volume of about 150 liters, you can make an aquaterrarium in sizes 90x45x40cm or 100x35x45cm. For a small turtle, a 50l aquarium is suitable – its dimensions will be 50x35x35cm.
IMPORTANT: When cutting, it is required to immediately lay a sufficient height of the walls – when water is poured, 20-30 cm should remain from its surface to the edge of the side. You also need to take into account in advance the level at which the shelf or the height of the island will be attached. An animal can easily get out of an aquaterrarium with too low sides.
Materials and Tools
To make an aquarium for a red-eared turtle with your own hands, you will need to purchase pieces of glass of a suitable size. You can cut them yourself or in a glass workshop. Smooth joints are very important for the tightness and strength of the device, so if you have no experience with a glass cutter, it is better to contact a professional worker. The thickness of glass for an aquaterrarium, on the walls of which a large volume of water will press, should be at least 6-10 mm. For work, you will also need the following items:
- oil glass cutter;
- sandpaper;
- adhesive sealant;
- masking or ordinary tape;
- ruler, square.
To work, you need to prepare a flat surface – a large table or free space on the floor in the room will do. When choosing a place, keep in mind that after assembly, a home-made aquarium cannot be touched for several days – until the sealant is completely dry. It is necessary to work with glass in protective gloves, at some stages a respirator is used.
IMPORTANT: Special attention should be paid to the choice of adhesive-sealant. Many construction adhesives contain toxic substances that can get into the water. A transparent silicone sealant without additives is best.
Stages of work
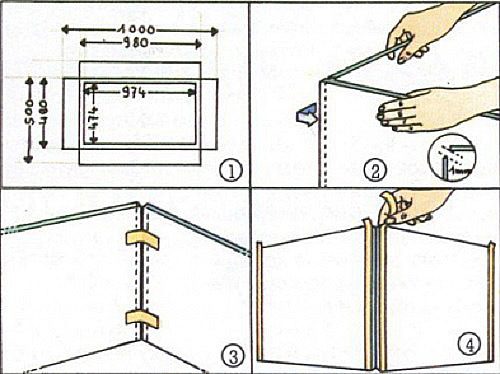
Cut pieces of glass must be pre-treated – wipe the sharp edges with sandpaper. The cuts should be as even as possible, a discrepancy of no more than 1-1,5 mm is allowed, otherwise it will be difficult to achieve tightness of the joints. When grinding, sharp particles of glass dust can get into the lungs, so you need to perform the sanding procedure with a protective mask. At home, it is better to use the bathroom for work, the always-on shower helps to quickly wash off the dust. After preparing the parts, the following steps are performed step by step:
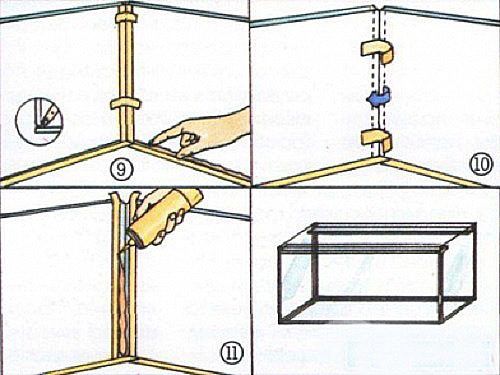
- A strip of adhesive tape is glued to one of the sides so that it extends beyond the edge.
- On the sticky side of the tape, the second part is carefully lowered, then both parts rise and fold at an angle, with the tape inward.

- Using adhesive tape, all four sides of the aquarium are assembled and placed vertically – it is necessary to check that the glasses fit as closely as possible to each other, and the sides are parallel.
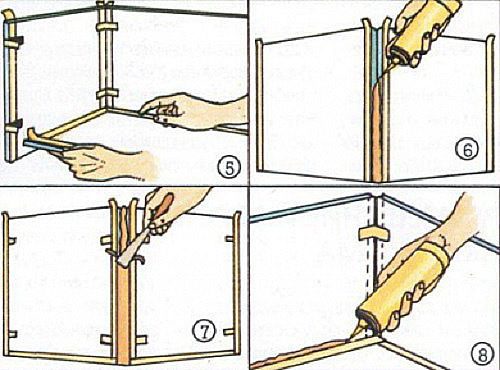
- All joints are degreased with alcohol and coated with adhesive-sealant in two layers – each layer is leveled with a piece of paper; so that the glue does not stain the glass, it is recommended to glue additional vertical strips of masking tape, which are removed after completion of work.
- Glue cannot be saved, it must fill the joints completely – for a better result, it is better to use a special gun that squeezes out the glue in even portions; if the adhesive layer is not dense enough, later the joint may leak under water pressure.

- A part of the bottom of the aquarium is laid on top of the structure, first on small droplets of silicone, then when the evenness of the joints is checked, they are also degreased and smeared with silicone.
- The aquaterrarium is left to dry for several hours, then gently turned over.
- All adhesive tape is removed, if necessary, traces are washed, internal joints are degreased.
- All seams are coated with glue in two layers, then they are also allowed to dry.
- The aquarium is left to dry for at least a day, after which it is filled with water and left for several days to check for leaks. Corners usually leak – if a leak is detected, the water is drained, the joints are dried with a hair dryer and coated with another layer of sealant.
 After drying, the excess silicone is carefully cut off with a clerical knife. A large aquarium can be strengthened with stiffeners – for this you need to place horizontal strips of glass or plastic 4 cm wide on wide walls in the corners. 3 cm recede from the top of the side, fastening is done with glue. In the future, these strips can be used as a support for a protective mesh or cover.
Video: creating an aquarium with your own hands
Islet making
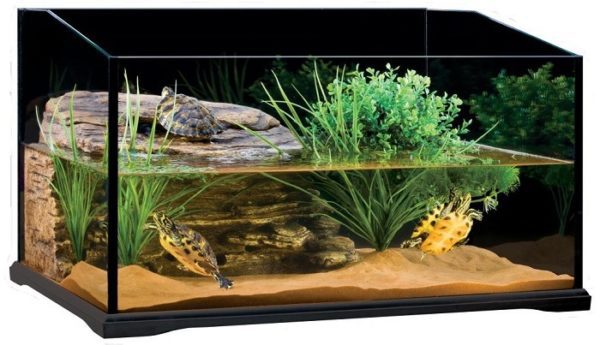
There are two ways to equip a turtle for the red-eared turtle with the necessary landfall. In the first case, the island is collected by their grits of flat pebbles and is installed on the bottom. The stones must first be washed and boiled, then laid out of them like a hill. You can use the shape of a grotto or arch to further decorate the aquaterrarium. The stones are fastened together with a small amount of sealant, the structure is left to dry completely. The finished island is lowered into the water so that the upper part protrudes above the surface and it is convenient for the turtle to climb onto it.
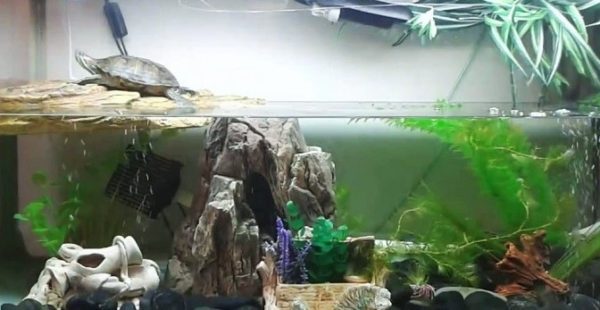 To make a shelf island, use a piece of glass or plexiglass, durable plastic is also suitable. To fix it, follow the sequence of actions:
- Marks are made on the walls of the aquarium at the desired height (the distance to the top of the walls should exceed the diameter of the shell of an adult turtle).
- The design is turned over to the side to which the shelf will be attached, the glass surface is degreased.
- For gluing, adhesive-sealant is used, the shelf should be located in the corner, with support on at least two sides, and you can also install a shelf that will be attached to three sides.
- To make it convenient for the turtle to climb onto the island, a ladder is made – a strip of glass or plastic that is attached to the shelf and rests on the bottom.
- Small pebbles and glass granules are glued to the surface of the ladder so that the pet’s paws do not slip.
It is recommended to glue the island shelf even at the stage of assembling the aquarium itself. Sometimes bulk soil is used to form land – sand or pebbles. To do this, part of the aquarium is separated by a partition of the desired height – the resulting container is filled with sand, water is collected in the rest. The turtle gets out of the water onto land along an inclined ladder. This method is not very convenient due to the difficulty of cleaning an aquaterrarium with bulk soil.
Do-it-yourself aquaterrarium for the red-eared turtle
3.6 (72.94%) 17 votes


