How to make a hamster cage with your own hands at home from improvised materials
“How to make a cage for a hamster with your own hands?”, the owner of the animal thinks, having studied the prices for the designs offered in the store. It is not always possible to independently make a room from improvised materials. However, at home, you can make a quality cage. It will cost several times cheaper than the store version.
Contents
Homemade hamster cage
If you’ve never taken on a job like this before, be prepared for the unexpected. The result does not always match the original plan. If you know how to saw, cut and grind – the task will not be impossible for you.
So, to make a cage yourself, you will need the following tools:
- metal mesh with small cells;
- pliers with narrow ends;
- side cutters;
- double-sided file;
- aluminum wire with a diameter of 2 mm;
- hard wire 2 mm thick for the manufacture of hook-locks;
- enamel or paint for metal and white spirit;
- paint brush;
- a piece of plywood 4 mm thick and fasteners to it;
- PVC sheet and glue to it.
PVC or plywood are for pallet cages. You need to take one.
The wooden cage is more environmentally friendly, but harder to assemble. The PVC pallet needs to dry for a long time after gluing, because the glue is toxic to animals. This will take a week.
Consider among the tools a jigsaw for sawing pallet material.
Step by step guide
Before you start working, decide on the size of the cage. Hamsters need low structures with a wide base to accommodate all the accessories. Consider the size of the animal: for large animals, the room should be higher.
You need to start with the cell frame. Make a drawing of the side walls and top. Think about where the doors, the feeder, the bedroom, the toilet will be placed. How convenient will it be for you to clean the cage. If in the future you want to complicate the design by attaching an additional link to it, keep this in mind. Provide a hole where you can insert the transition tunnel. So, let’s begin:
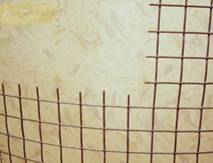
- Based on your drawing, calculate the amount of mesh of other materials. Buy a net with a margin of about 0,5 meters.
- Spread the net on the floor, securing one end with a weight.
- Cut out all the details of the structure from it: walls and ceiling. It is easier to cut along the cell itself.

- Cut off the protruding tails with side cutters.
- Cut out all the windows and doors in the blanks that you have provided.
- From the rest of the mesh, cut off the “patches”. Those pieces that will cover windows and doors.
- Run your finger along the edges of all the details. File sharp protrusions.
- Paint the grate after cleaning it with white spirit.
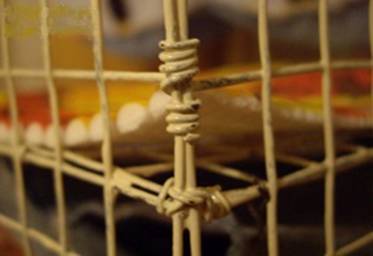
- Connect the frame parts with aluminum wire.


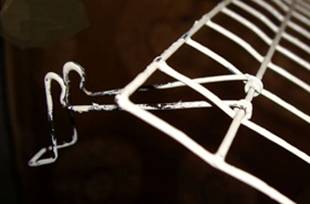
- From hard wire, make clips on the door. You will have to bend with pliers.

We have finished making the mesh frame. You have to go to the pallet.
cage tray
The pallet must be assembled after the frame is ready. To correctly assemble the hamster cage, you need to take into account the margin for the material thickness (4 mm) + 1 cm in the parameters of the pallet. If you have a rectangle of 40×50 cm, the sheet size of the pallet should be approximately 42×52 cm. Consider a PVC pallet. Wooden is done in the same way, but with a different mount. You have measured the perimeter of the cage, bought a PVC sheet 100×100 cm, we begin to make:
- Measure the desired parameters on the sheet and saw off according to the markup.
- Make the sides. Set aside 4 strips of the same width on the remaining piece of sheet.
- 2 sides need to be glued to the side parts, 2 – to the front and back. They must match the length and width of the plate itself. Some have a length of 42 cm, others 52 cm. The height of all sides is about 10 cm. For strength, we attach the sides directly to the plate, and not to the side.

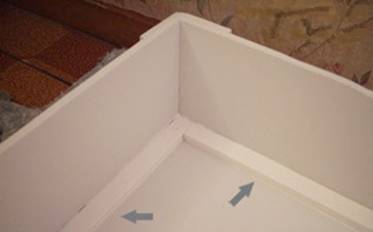
- On the inside of the box, you need to glue plastic slats about 1 cm. They will close the junction of the plate and the side. The length of the rails can be measured along the inside of the box. They will be slightly shorter than the sides of the plate.
- If the cage turns out to be heavy, make stiffeners at the bottom on the outside so that the PVC does not sag. To do this, cut three strips from the remnants of the sheet 1,5 cm wide along the length of the plate. Glue them to the bottom outside.

- So that the sides do not diverge, stick the plates end-to-end on them for the entire height of the pallet. The width of the plate is 6-8 cm. For 4 corners, you will need 8 plates 8×10 cm.

- If the cage will stand on the floor, make legs for it. Each leg will consist of 4 pieces of plastic glued together in a “stack”. The size of the pieces is 5×5 cm. In total, cut out 16 of these plates.
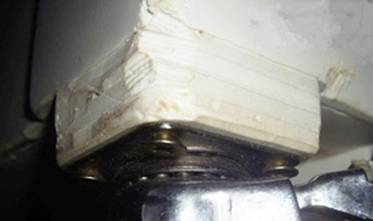
Please note that when working with PVC glue, it is necessary to dry the pallet for a long time. Poisonous substances will evaporate in about a week. This is a general scheme for assembling a pallet. You can change, add or remove something in it. The mesh frame must be installed in the pallet. The cage is ready.
How to make a hamster cage out of the box
When it comes to a box, do not immediately imagine cardboard. Animals have sharp teeth. Cardboard and paper will be eaten very quickly. Large plastic containers seem to be designed to be used after minor modifications for animals. A small container is perfect for a Jungar, a larger box for a Syrian hamster.
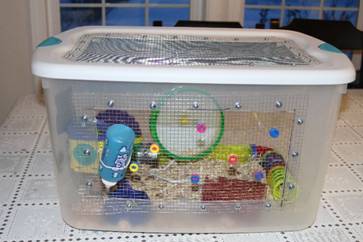
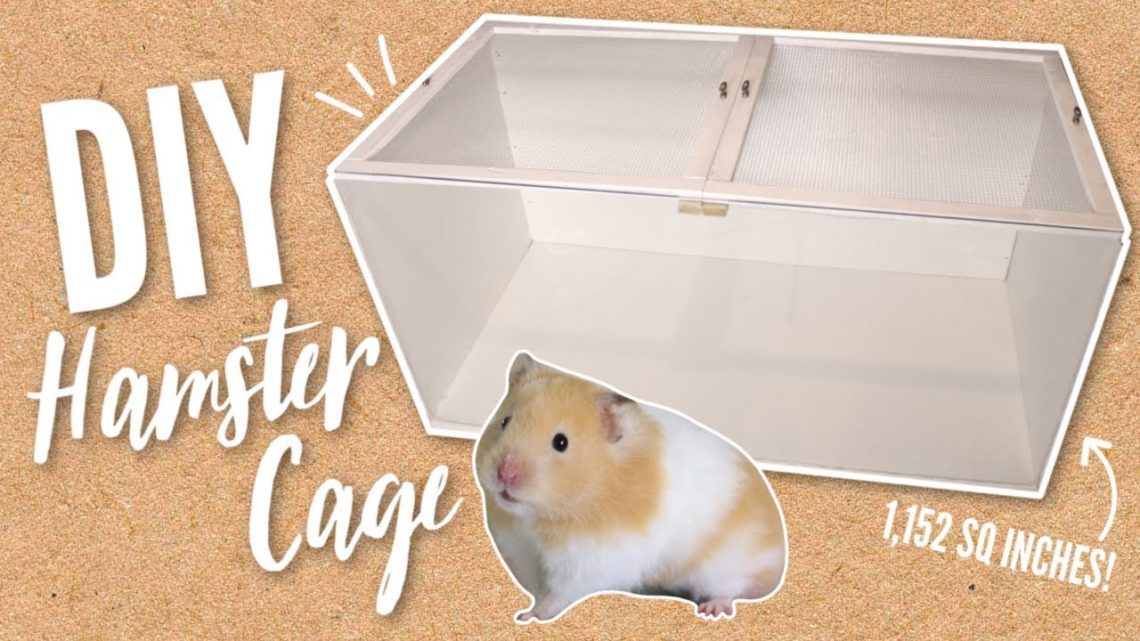
Rectangular containers have one drawback – they do not let air through. By replacing part of the lid and side walls with a fine grate, you can provide your pets with spacious housing. Pay attention to the way the lattice is processed, described above. It is unacceptable for the hamster to cut himself on the sharp edges of the grate.
You can cut through the plastic with scissors or a sharp knife. Attach the grate – screws with a nut or self-tapping screws. Holes for self-tapping screws are best pre-drilled or pierced with a heated awl. Some use a soldering iron for this. Screws or self-tapping screws must be inserted from the inside so that the sharp ends stick out and do not injure the animals.
How to make a second floor in a hamster cage
The second floor of the cage may be needed to accommodate another animal there. Hamsters rarely like the neighborhood of their relatives. In this case, the two boxes are simply stacked one on top of the other. At the same time, at the bottom you need to add a ventilated space (replace another wall with a grate).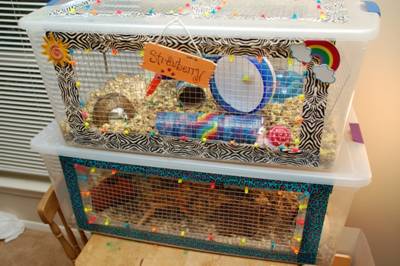
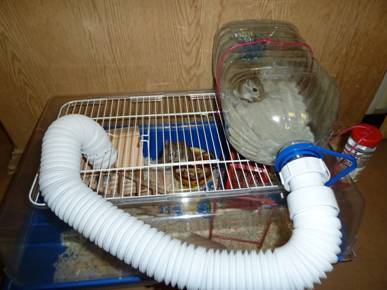
If the second floor is needed for one pet, you can solve the problem in the same way. Place the second box on top of the first, but connect the two cells with a tunnel. Hamsters love different transitions. Your animal will run from one box to another. This will expand its “habitat” and will be able to place more different equipment. Plastic tunnels and mazes can be made from bottles or purchased ready-made at the pet store.
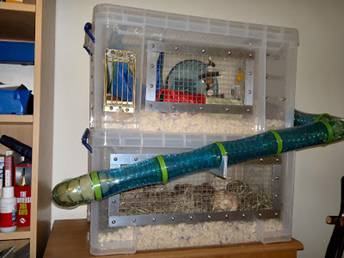
To make your own tunnel, cut the bottom and neck of a plastic bottle so that both ends are the same diameter. Tape the edges along the line of each cut. Insert one bottle into another and fasten with tape. Make sure the mount is strong enough. Choose the size of dishes according to the size of the animal. A large animal needs a capacity of 2 liters, a Djungarian hamster needs 1,5 liters.
There are craftsmen who use white corrugated and gray plastic pipes for tunnels, which are used when installing a washbasin in the kitchen.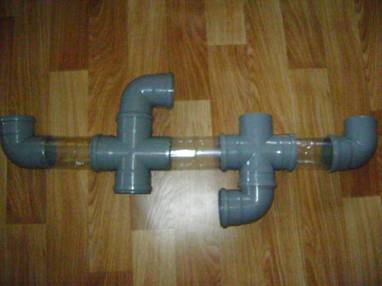
Cage for hamsters from plastic bottles
Temporary housing for animals can be made from six-liter plastic bottles. It is necessary to take 3 bottles of the indicated volume. Cut off the upper part “shoulders”. At the cut off part, remove the part of the “collar”. There remains a small funnel with a thread and a lid. If the edges of the funnel are sharp, stick tape on them. The “ceiling part” must be cut off from the cover so that the washer remains on the thread.
Bottles should be placed vertically in one row or in a triangle. These will be your hamster’s 3 rooms. Cut holes a short distance from the bottom. The size of the holes should correspond to the diameter of the neck. Holes are transitions from one bottle to another, so make them at the same level in adjacent links. The role of mini-tunnels will be performed by bottle necks. Connecting bottles:
- Place two bottles upright in front of you.
- Remove the cap from the neck. Take it in your right hand.
- In your left hand, take the neck without the puck. Dip your hand into the left bottle and stick the neck into the right bottle.
- In the right bottle, lower your right hand with the cap washer and screw the washer onto the neck.
Now you have a mini-tunnel, which you fixed with a washer. Three interconnected rooms need to be filled with hay, sawdust, a shelter, a feeder and a drinking bowl. To repair a cage made of such material, it is enough to replace one link with another. This room can be expanded by adding any number of rooms.
DIY hamster terrarium
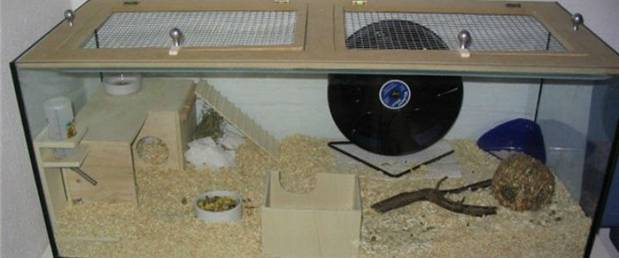
There are some advantages to keeping rodents in an aquarium or terrarium. These containers provide a good overview. Odors do not penetrate through the glass. Among the shortcomings can be identified:
- the complexity of fastening the drinker and the running wheel;
- high humidity;
- heavy weight and fragility of the structure.
As a rule, pet owners take ready-made glass boxes for their pets and cover them with nets. If the mesh is high enough, the material of the mesh is not important.
The animal will not reach it with its teeth. In a homemade terrarium, it is difficult to provide sufficient ventilation. It is worth giving preference to low aquariums with a sufficient bottom area.
Glass is a cold material. The bottom of the terrarium should be lined with a large layer of sawdust or an additional surface coating should be provided. You can build a cage from plexiglass. It is lighter in weight and warmer, but prone to scratches and looks cloudy.
What else can you make a house for a hamster
If your family does not mind, use a pedestal or bookshelf under the rodent room. It is enough to make small changes: replace the upper part of the pedestal with a mesh, drill additional air ducts and holes for attaching a drinker and a wheel – the cage is ready.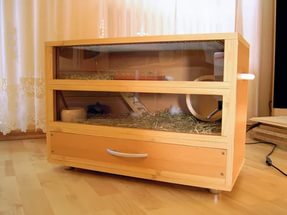
It won’t look like a fun structure from the “Cream of the Show” videos, but it has enough space for the animal to live comfortably.
Don’t try to learn how to make a paper hamster cage, it’s impossible. The paper will be “chewed” very quickly, and your animal will be free. Sometimes they make shelters for one night out of paper or temporary rooms out of cardboard.
You can find many opportunities to build an inexpensive and comfortable home for a small animal. Connect your imagination and your skillful hands, the result will not be long in coming.
DIY hamster cage
3.1 (62.11%) 19 votes


