
#FitnessForSaddle from Galina Chernaya: How to lower the heel down?
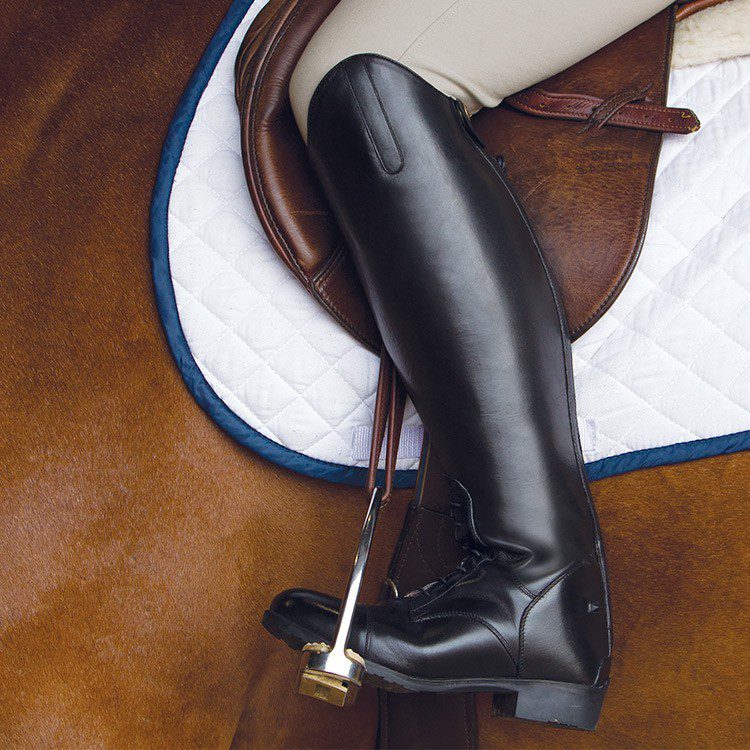
From the first day in the saddle, the rider is told to “keep your heels down,” and from that moment on, the rider painfully tries to keep his heels down and presses them down with force below the stirrup. Is this correct, and why do we need to keep our heels down?
Heel down position:
— Increases the contact area of the foot with the horse, which improves the impact of the controls.
— Focuses the rider’s weight on the lower body. The heel lowered down serves as a support for finding the necessary balance in the saddle when the horse moves.
— Prevents the foot from slipping through the stirrup.
— Demonstrates flexibility and therefore the ability to act as a shock absorber.
It is safe. Properly distributed balance in the saddle is the rider’s best assistant in emergency situations.
“Putting your heel down” sounds simple, but for many it is a difficult task.
If you feel that while riding, the heel “climbs up” all the time, then make sure of two things:
— Do you understand the term “shankel” correctly?
— Is your ankle joint elastic enough and how developed are the calf muscles?
We will understand in order.
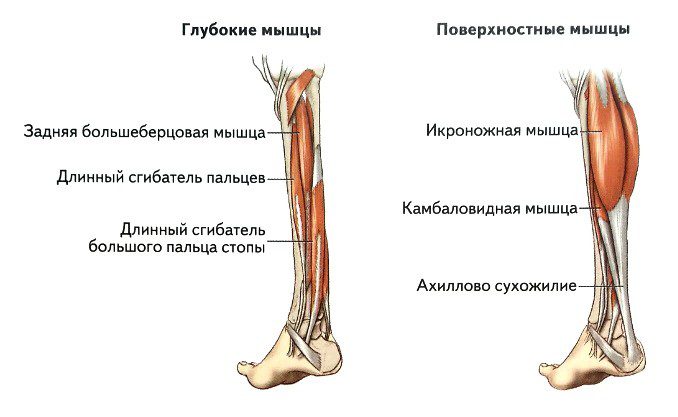
Schenkel ( Leg aids ) — one of the rider’s natural means of control. The place of contact of the inner part of the leg from the knee and below (the muscles of the lower leg in the photo) with the body of the horse is — leg.
Leg pressure demands forward movement and energy from the horse.
Keeping the leg on the side of the horse indicates the continuation of the movement.
Leg pressure on one side requires the horse to bend or sideways.
From this we understand that the heel is not a leg which means we do not need to constantly use it and lift it up, digging into the side of the horse every pace.
It’s important to know.
I want to draw your attention to the fact that the spur located in the area of the ankle joint is an additional means of control and does not replace the leg! Even if the rider has a spur on his foot, it must be chosen in such a way that the rider can easily apply it at the right moment and return the leg to the correct position – “heel down”.
If your heel continues to “creep” up and you find it hard to physically lower it down, then make sure that the ankle joint is not blocked and is elastic enough.
Cramping of the calf muscle while riding and pain in the ankle joint are indicative of insufficient physical preparation and tightness.
Contents
Correct footwork
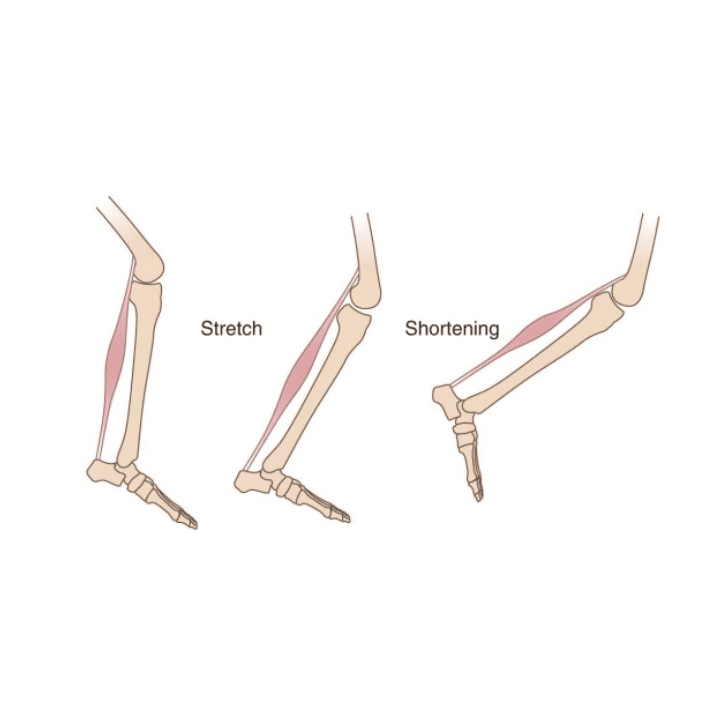
You do not need to constantly press the heel down with effort. The Achilles tendon must stretch freely and elastically and then contract naturally in order to work correctly and efficiently without interfering with the horse’s movement. Every movement of the horse is cushioned, placing the rider deeper in the saddle.
Exactly elastic ankle joint promotes deep seating while jumping or riding dressage movements, as well as helps to sit in the saddle with greater balance, move with the horse, work the legs correctly and freely.
The two most effective exercises for developing the muscles of the lower leg and developing the elasticity of the Achilles tendon.
What to do before starting exercise.
As always before training, before you start doing exercises on the calf muscles, you need to warm up these muscles. Self-massage will help with this, since there is no difficulty in massaging this area on your own. It is also necessary to stretch the joints of the ankles and fingers. This will help to avoid stretching during exercise.
1. Exercise with a step platform
If there is no platform, you can perform these exercises on a step.
Initial position
Stand with your toes on the edge of the platform or step. Keep your back straight.
Technique of execution
Rise on tiptoe as high as possible. Lower your heels as much as possible, significantly stretching your ankle. You can take a dumbbell in your hand, leaning against the wall with your other hand.
Recommendations
Alternate the position of the legs, keeping the feet parallel, then moving the heels or pushing the socks apart. This will help to work out different parts of the calf muscle. With a parallel position of the feet, the middle part is worked out, with shifted heels – the inner surface of the muscle. If the toes are shifted, then the main load falls on the outer surface.
2. We rest our foot against the wall and pull the body
It is convenient to perform the exercise on the street near a pole, a tree or near a Swedish wall.
Initial position
We raise the sock, pressing it against the pole and resting the heel on the ground.
Technique of execution
Slowly pull the body closer to the pillar (wall).
It can be performed immediately on two legs if the surface into which the emphasis is placed allows. You should feel a stretch in your calf and Achilles tendon.
Your Blackstable.club


You May Also Like
Do we need horses?

A few words about the “independence” of the shankel
