All about “heels down” – theory and practice
All about “heels down” – theory and practice
“Heels down!” – the most frequently repeated command among trainers and, accordingly, the most common problem for riders, especially beginners.
Unfortunately, in everyday life there are too few situations that would force a person to put their heels down, so for our muscles, tendons and ligaments, this position is uncharacteristic and uncomfortable. But a rider without these ill-fated heels is nowhere …
So, why do we need to lower our heels?
A dropped heel is the basic building block in the foundation of a good ride. Notice I didn’t say “first” because this block is one of the many needed to create a good foundation. Sometimes the basics are taught correctly, sometimes not. And this often depends not only on the coach, but also on the age and abilities of his student.
The heel down is one of the most important fundamentals of riding. Unfortunately, if you don’t take steps to properly stabilize your heel in the correct position, this problem will come back to you more than once. There are no shortcuts, short cuts, or special stirrups that can take the place of lengthy basic training.
Below I will provide list of reasons, for which you have to fight with yourself:
1. Security
This is the most important reason why the heels should be down. Only in this position the foot is safely in the stirrup.
One of the sensations that we, as trainers, try to develop in our riders is the feeling that the center of gravity goes down to the saddle. Properly dropped heels distribute the weight of the rider in the saddle and around the horse, not on the widest part of the foot. With sudden sharp movements, turns, stops, heels lowered down will allow the rider to stay in the saddle!
2. Reliability
“Heels down = weight down = more secure position in the saddle.” Less hesitation and unnecessary movements. Rocking in the saddle makes students feel very insecure.
3. Balance
Properly dropped heels prevent balancing on the widest part of the foot.
4. Landing
All of the above allows the rider to develop a more stable and quality seat.
5. Controls
The rider’s legs “lengthen” and assume a more stable position, which helps to better use the weight and controls (leg, sluice).
Imagine this: your student is riding down the track when his horse suddenly encounters a “horse eater” and jumps to the side. The rider’s heels rise up, his weight goes up, his arms lift up, and the horse effectively jumps out from under him. It’s quite another matter if the rider’s heels go down, the weight stays in place, the arms stay down and he handles the situation easily…
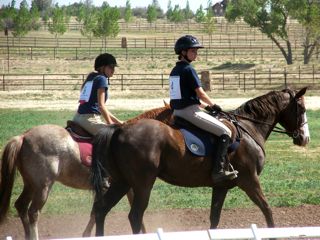
How do you like this picture? Your student is learning to ride at a posting trot, to lighten up. He trots along the wall of the arena, and the horse suddenly makes a sharp downward transition (oh, those good jokes of training horses). The rider’s heels rise up and he falls on the horse’s neck or, even worse, falls out of the saddle to the ground … “Correct” heels would help him maintain balance and stay on the horse.
In any case, a rider whose heels are down is in a safer position, avoiding injury and, just as importantly, avoiding blows by self-confidence. If the rider’s heels go up, he balances on the widest part of the foot, and the balance there is very fragile. Even if the rider does not fall down to the ground, he feels insecure and cannot fully grow as a rider – he fights not to fall, instead of acquiring new skills.
What results in properly dropped heels?
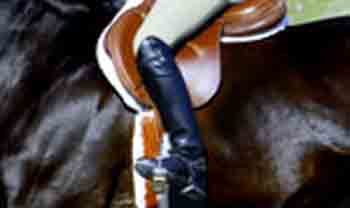
1. The correct position of the rider in the saddle
It is impossible to properly lower the heels without first sitting correctly on the horse. When I say “sit right” I mean the rider’s balanced position above their own legs. You can tell if a rider is sitting correctly if a straight line can be drawn across his heel, hip, shoulder and ear (whether walking or standing). At the trot, the rider’s ear and shoulder may deviate slightly forward from this imaginary line, depending on the seat in which he is riding.
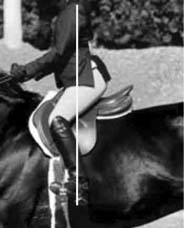
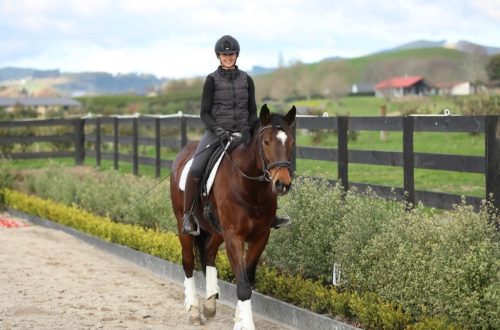
The rider rides at a trot. He “sits” over his legs. The line shows us that the rider’s heel is under his thigh. The heels are well let down, perhaps more than necessary.
2. Balance
Any correct position on the horse must be such that the rider will be able to stand steadily on the ground in the same position if the horse is removed from under him. It doesn’t matter if his stirrups are long or short, whether the rider is in a half-stance or a training landing – if the rider cannot maintain balance in this position, standing on the ground without a horse, then he will have to constantly catch the balance on horseback.
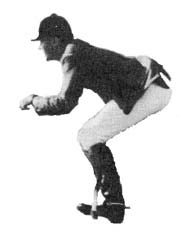
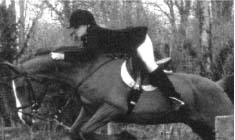
This rider is in a jump, he has perfect balance over his legs and his heels are very well down.
A balanced rider sits above the horse’s center of gravity. The center of gravity depends on the style of riding, the skill of the rider and the degree of collection of the horse. An example would be a rider who rides at forward speed (jumps) vs a Grand Prix dressage rider. The rider at the races sits closer to the withers, the Grand Prix rider sits at the back, as with an increase in the degree of collection, the center of gravity of the horse shifts to its hindquarters.
3. Good posture
In order to be able to properly lower the heels, the rider must sit up straight, stretching the body up. When the rider is hunched over, covering his shoulders, or tucking his seat (sitting on the back pockets of his pants), he cannot drop his heels down. With this posture, the muscles are blocked, and the weight does not go down into the heels.
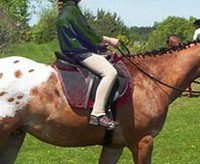
The beginner should be encouraged to sit upright and “high”. When the rider sits down in this way, his weight does not “stuck” in the coccyx, but goes down to the heels.
4. The right saddle
The saddle must fit the rider and the horse, and properly rest on the horse’s back. The rider must sit in the deepest part of the saddle.
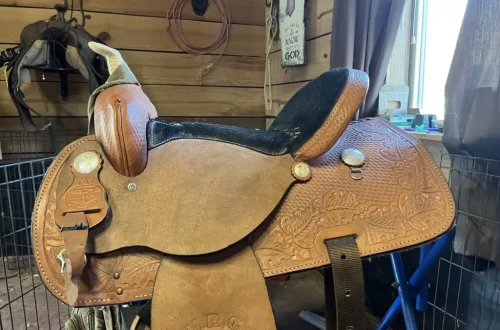
This saddle is too small for this young rider and does not allow him to sit in the deepest part of the saddle. A “too big” saddle will force the rider to sit “behind” their legs. Both positions block the flow of weight into the heels.
5. Stirrup adjustment
It’s important to make sure your student’s stirrups are properly adjusted so they can lower their heels properly. If the stirrups/stirrups are too long, the rider will be on their toes and will not be able to drop their heels. If the stirrups are shortened, this will close the corners of the hips, knees and ankles and allow your rider to drop their heels, allowing the weight to come down.
There is a rule according to which the approximate length of the stirrup is determined: the base of the stirrup should be at the level of the “bone” of the ankle when the rider removes the foot from the stirrup.
As the rider’s skills and physical development improve, over time he will be able to ride longer stirrups.
Some heels look like they are down, but inthe rider, who pushes his heels down by force, pushing them further forward, rides behind the balance and “on the pockets of his trousers.”
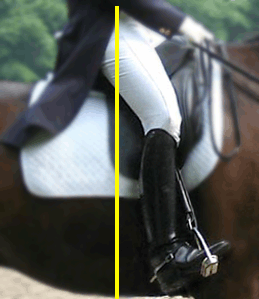
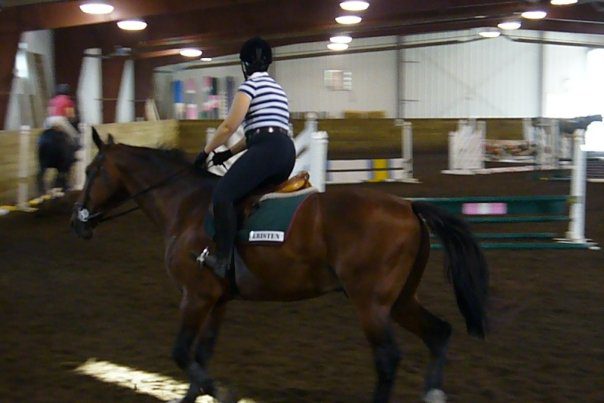
This rider pushes their feet forward to drop their heels. The rider rests on the stirrups and helps herself with the reins so that she is not beaten off at the trot. I wish she could sit over her legs and use her ankles as relaxed shock absorbers.
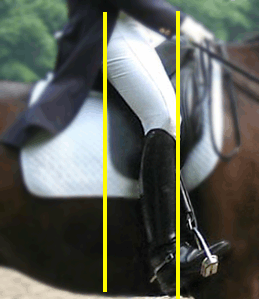
two the yellow lines in this picture are the thigh-heel lines and they don’t line up.
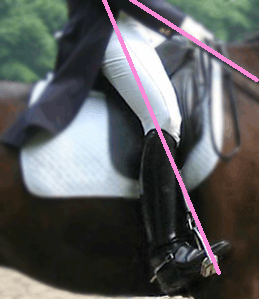
To demonstrate this, have your student sit on a chair with their feet forward, as this rider does. Now ask him to get up from the chair without using his hands. He will see that the only way to do this is to tilt the body forward towards the legs. Then ask him to try again and pay attention to what is happening with his hands. If the rider in the photo were to ride at a posting trot, he would have to lean forward at his feet or pull on the reins to get up from the saddle. He may have to do both. In the picture, thanks to the pink lines, we see that the rider is riding in a training trot, helping himself with the emphasis on the stirrup and emphasis on the reins.
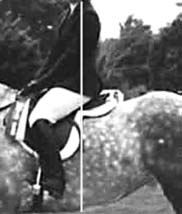
This rider gives the impression of dropped heels as he moves his foot forward. She sits behind her legs.
The rider who does not let the weight go to the heels lifts up his own point of balance and shifts (shifts) the balance forward, either clings to the knee against the horse, or falls forward, or does all three actions at the same time.
6. Effortless
Heels do not need to be lowered with force. They just need to be lower than the toes to help bring the weight down. By forcing your heels down, you tense and enslave your muscles. The leg becomes rigid, but should be elastic and be able to absorb.
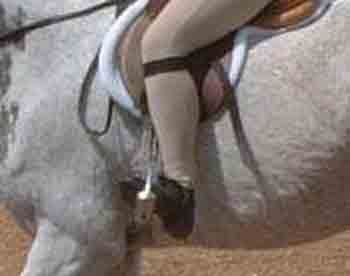
If the rider places the foot too deep in the stirrup, the ankle will not spring back and it will be difficult for the rider to drop the heel.
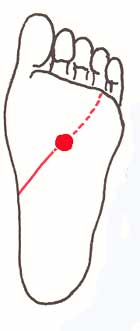
It is easier for the ankle to bounce when the stirrup rests on the widest part of the foot, in front of the toes.
But why is it so difficult to lower the heels?
Understanding the root of your heel problem will make it easier for you to find ways to fix it. Two particularly common mistakes are twisting the ankle (which can lead to soreness in the outer part of the lower leg) and lifting the heel to send messages to the horse.
Finger lift
Raising your toes instead of dropping your heels down stiffens your ankle. Raising your fingers up is very easy, and you can feel what it feels like even while sitting in a chair. Try to do this and you will feel that your ankle is tensed, and the muscles along the lower leg are taut. You got your heel down, but you put a lot of strain on your lower leg. Toes up is best used as a stretching and strengthening exercise, not as a way to drop your heel.
Incorrectly placed foot in the stirrup
The foot, standing in the stirrup incorrectly, enslaves the ankle. If you put your foot in the stirrup up to the heel, your ankle will not be able to “spring”, which makes it very difficult to correctly apply the controls.
Lifting the heel up when sending the horse
The little rider sits well in the saddle, her body is well above her legs and her heels are probably well down when she is not sending out her pony. Heel lift occurs when riders and horses are not the right size for each other. For example, a small rider on a big horse or a long-legged pony rider. Unfortunately, lifting your heel while sending is a hard habit to break, so care should always be taken to ensure that riders are riding appropriately sized horses. The heels also rise when sent when the stirrups are too long. The correction consists in shortening the length of the putlisch.
Ankle twist
Ankle twist occurs when the rider puts more weight on the little toe and tries to turn the toes towards the horse to bring the foot parallel to the horse’s body. This is another bug that needs to be actively addressed. Most people, due to structural features, cannot force your feet to be parallel to the horse’s side without twisting your ankle and pressing your little toe against the stirrup. Often, when you look at such a foot, you will see that the widest part of it does not press evenly on the stirrup. The result is a twisted ankle that does not allow the rider’s heel to drop down and a rider whose ability to properly use the leg is greatly reduced.
Often riders who twist their ankles will experience pain or numbness in the ankles or the extrinsic calf muscles. The foot should stand in the stirrup so that its widest part evenly presses on the base. Any adjustment to the position of the foot in the stirrup should come from a change in the position of the hip, not the ankle. Developing the ability to properly place the foot in the stirrup takes time, as the muscles, tendons, and ligaments of the rider’s legs need to get used to the new position.
Twisting of the toes
Tension manifests itself in riders in many ways. Sometimes it’s hard to understand what’s going on inside their boots or boots! Children sometimes come to class in the shoes they grew out of, and you should always keep this in mind and ask if everything is in order. The same goes for riders who clench/curl their toes. Curling your toes into a “fist” tenses unnecessary muscles and locks your heel. To correct this habit, ask your students to wiggle each finger individually from pinky to thumb. This will help your fingers relax.
Boots/boots that are too narrow/tightly laced at the ankle
Shoes are the culprit here. Riders lace up their shoes tightly, as if they were going to skate or roller skate. Poorly tightened boots are a disaster on the ice. But the rider’s leg should be free and springy at the ankle. Loosen your laces. Make sure the boots fit well and are not tight or tight at the ankle.
Feet turned out
Another incorrect heel position is the foot turned outward with a well-dipped heel. The ankle is enslaved, the leg is blocked. Although the heel is down, there is no benefit from this. There is no way for the rider to properly use the subtle controls.
No “spring”
Some people’s ankles are naturally less flexible than others. This is a feature of the building. It may be physically difficult for such a rider to drop the heel down. But, if the rider can lower their weight down through the seat and the foot into the heel correctly, then even if the heel is only slightly lowered, the functionality of the leg will remain. The same goes for lack of flexibility as a result of injury.
Heel work
Moving weight into the heels is not only physical, but also psychological work. Riders should imagine how the weight flow flows from the head to the heels. They need to think about how their heels are getting heavy, because all the weight “drains” there.
Adults often store a lot of tension in the area between the shoulder blades. This tension causes the center of gravity to go up, which goes against a lot of the right things we’re trying to achieve in our training, including “right” heels. It is very useful to imagine how the weight flows not only into the buttock, but also goes lower. Even children can understand the importance of dropping heels and imagining their weight dropping down. Children love vivid examples and associations. Encourage them to describe the ways in which the weight “flows” into the heels. Let them use their imagination and not just follow your commands.
Once the rider understands why heels down and how to do it, he usually begins to consistently work on this skill. This is a stimulating factor. If students themselves create a stimulus, they begin to work on it without compulsion. However, if the coach or instructor does not explain why dropped heels are so important, the student will not take the matter seriously.
How we are working?
Physiologically, the tendons cannot stretch much, but we do not need a huge stretch to properly lower the heels. Since “heel down” is a rare position of our heels in normal life, a little work on stretching these rather inextensible tendons will be very useful. Ankle exercises and general strengthening exercises will help you here.
It’s hard to become a great rider if your horse training is limited to one or two times a week. But a significant part of the progress in riding is proportional to the work on the physical form. This work makes the rider more flexible and strong. Give your students a list of exercises and tasks they can do while not in the saddle. This will help them progress as riders.
Tightness in the rider’s lower back affects many parts of the rider’s body while riding, including the heels. A stiff lower back reduces the ability to raise the leg high enough to reach the stirrup and can also cause weak hips. Tight hamstrings can prevent the rider from allowing weight to “flow” into the heels.
Exercises for riders
1. Exercise out of the saddle
1.1. Stretching the muscles of the back and the hamstring group
We reach for the toes. We become even, lean down and touch the toes with our fingers. We count to 12. We slowly straighten up.
1.2. Relaxing the ankle and stretching the calf muscles
We sit in a chair, the shins are vertical to the floor. Raise your toes up, bending your ankle. We count to 12. Then we release and do the second approach.
1.3. Ankle circles in both directions
Rotate the leg at the ankle to the left 12 times. Then right 12 times.
1.4. Strengthening the arch of the foot
Holding on to the door frame, we stand on one leg. We rise on the toe so that we stand on the widest part of the foot. The back is relaxed. The average person should be able to do 25 lifts in a row without overworking. (An added benefit is strengthening the lower legs and thighs.)
1.5. Foot stretch
To stretch the tendons and develop the ability to transfer weight into the heels, stand on the bottom step of the stairs with the widest part of the foot and slowly lower the heels down. Hold on to a railing or wall to keep from falling. Don’t jump up or down as this can cause severe crepitus.
If you don’t have a ladder, you can buy plastic or foam pipe and cut it in half. It works just like a step and can be transported.
1.6. Stretching the arch of the foot
Stand on your half of the tube so that the arch of your foot aligns with the arch of the tube. Count up to 15.
1.7. Calf stretch
Stand about a meter from the wall. Feet are flat on the floor. Lean forward and place your hands on the wall. Count to 15. Don’t overexert yourself. Adjust the distance to the wall according to your height and arm length.
2. Exercises on the horse
2.1. We stand on stirrups and can be balanced
The rider holds on to the mane or strap on the saddle/neck of the horse and rises in the stirrups, allowing the weight to sink into the heels. The knees are slightly bent for cushioning. Make sure his seat is not pushed forward onto the pommel of the saddle. This exercise should be practiced at the walk and trot. It gives the rider the added benefit of allowing them to work on their balance and find their center of gravity.
2.2. Two-point landing
The two-point landing is an exceptional heel exercise. The rider may hold on to the mane or strap to stabilize themselves as they shift weight into their heels. Don’t let the rider lean on the horse’s neck, as this puts the weight on the hands instead of the heels. Work on the exercise at the walk, trot and on the poles.
2.3. Circular movements of the ankles
The rider removes the feet from the stirrups and performs a circular motion as described above.
2.4. Stretching
Standing on the stirrups, the rider rises and falls at the expense of the ankles, as he did with the help of a step.
What will we achieve as a result?
Developing a strong base and correct heel position is one of the foundations of riding. It’s not just an aesthetic fit factor. To help your students develop the habit of “correct heels”, you need to pay special attention to this. You should keep an eye on this in the early stages of training. It is much easier to train a rider from scratch to properly lower their heels than to correct established habits later. If you yourself believe that properly dropped heels are important, then it will be much easier for you to convince your students of this. As soon as the student himself understands the importance of the problem, he will take care of himself and work in the right direction. And then, eventually, he will be able to develop this skill to perfection, which will create the necessary foundation for successful riding.
Barbara Allyn Fox. Translation Valeria Smirnova based on site materials http://theridinginstructor.net/


